Sunday, April 17, 2011

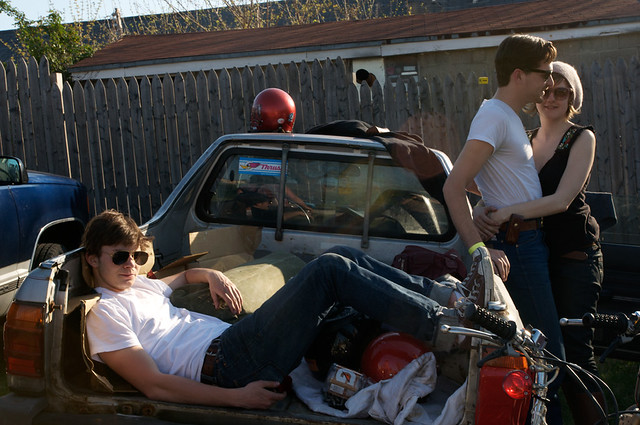
Busy Weekend.

Pulling a couple long days here trying to get these all finished up.
From Heads


I was going to link to the category of my heads on 1977mopeds, but it would appear that they have all sold out except for the 44 mm hero puch. Wow. Or its a glitch.

Either way, Moped Factory parts are now for sale at 1977mopeds.com. I promise i'm working on the website with all the information on models, specifics, and tips for the best setup, but right now I'm pretty slammed.

From Heads


Also got a whole pile of stuff in development that should be coming out as soon as i catch up on my current production. I'll be putting out big shipments to The Treats Gang and 1977 Mopeds as soon as I make them. Rollers, Batavus stuff, and the other little random parts will be getting done soon as well. promise!

The Moped Factory is becoming a real second job for me right now, and I gotta say, as much work as it is, its pretty great to be able to make this my job. Thanks so much to everyone who is supporting me and buying my stuff, helping with development, and testing products. I'm undergoing a real tight spot right now because I'm a bit too big for my current production level, but not quite big enough to afford the equipment and help that it will take to push this to the next level. Thanks everyone for being so patient with things, I'm trying to focus on keeping my quality #1 no matter what size I am, so there will probably continue to be long waits for the next couple months while things grow. If you have any questions or want to know where your parts are at, or how long out something might be, feel free to email me.

Tuesday, April 12, 2011

Mopeds= Ice cold.

Seriously how cool are these people?

Cant wait for rally season!

Thursday, April 7, 2011

increases to the motion of ambient particles (including myself)

This spring business is finally starting to take hold, and as the little particles of matter all around me increase their non-directional molecular activity, I'm gradually feeling the pull of life wrenching me from what now feels like a winter of hibernation. Funny to feel that way, as I"ve basically been as busy as humanly possible, in fact I think I'm getting enough done right now for two or three people., but I do.
The last few months here and the resulting snow melt have resulted in a near constant need to empty water buckets, move tarps, and re-arrange my already tiny cramped workshop to accomidate a constantly leaking roof. The combination of weight from snow and standing water managed to drench a lot of my stuff in acrid, sticky, vaguely organic 'roof juice' which anyone who has ever lived with a leaking roof will know exactly what i mean. Aside from the property damage, the big loss was at least 3 or 4 saturdays spent doing nothing but disassembling and rearranging the elaborately constructed makeshift organizational system at the workshop. Shelves, my paint booth, all the roof bits, light fixtures, and tarps and buckets constantly shifting to mitigate the damage from the drips which never come down twice in the same place. The 15 gallon drum i was using as a catch-all, with tarps, funnels,buckets and hoses running into it, was filling up just about once a day, sometimes overflowing and re-soaking anything near the floor. So yeah, that has been a bitch.

Good news is, the frustration of all this, plus my brother moving down with us has motivated Caitlin and I to find a house with onsite garage so i can save money on the shop and work closer to home. I'm finally back on track with the Moped Factory parts and chewing my way through a 3 week backlog. Sorry to everyone who is patiently waiting on parts for spring.

Also contributing to the backlog was me taking a week to check out the ConAg (construction/agriculture) expo in Las Vegas. This was unbelievably rad. Especially to engineering nerd types like myself who have chubbs for huge construction equipment, 2500 hp diesel engines, turbochargers the size of a dorm fridge, etc. It was great to meet so many cool people in industry doing amazing things, and so many of them wanting to hire young engineers. Definitely didn't look like a recession at the vegas expo center, thats for sure! All in all it just encourages me more to get my act together with this whole engineering degree thing and git-r-dun as they say.
On the moped front, things have been slow, mostly working on moped factory parts.. boring stuff really, not even doing r&d, mostly just stuck in production. Dont get me wrong, i love making parts especially when i know how many bikes will run better this summer because of me. Especially getting to see my parts on bikes at rallies built by people i dont even know... its pretty great, but its a lot of work and as fast as things sell out i dont ever feel the sense of completion.

I got a chance to work on the sachs for a few hours last weekend. Got the seat all set up, just need to pad it and sew up a cover now. I painted all the bracketry black because it had been rusted out by bird shit before i got the bike. I also made a really awesome air cleaner housing out of fiberglass that i'm pretty proud of. I've done 'glass work in the past but i always forget how easy it is- and rewarding. Metal can be a lot easier to work with in simple shapes, especially when you have the tools, but fiberglass is basically like paper mache' with some nasty chemicals. When done right it can yield non-structural parts in crazy geometries, which this air filter had to be. I think it will make the tuning go a lot better with a little capacitance on the intake, and the carb comes out right into the front fender, making it impossible to fit any other standard sized pod filter on there. This will bring the air intake up high, under the tank where it should stay clean and dry. Plus I want this bike to be ninja-quiet so the airbox should help with that too.
Cant wait to get this bike on the road, when i mocked-up the seat i took it around the shop a little bit and boy does it have some nuts. Probably wont be wanting to do clutch-droppin' wheelies with the touchy sachs clutch, but having that manual gives you such nice control of your clutch engagement, and it feels really unstoppable.

anyhow, i gotta get back to homework. i'll try to put up some pics so things aren't so boring on here.


Wednesday, January 26, 2011

Peugeot 103 Ignition coil re-winding

The Peugeot 103 models made before 1980 or so were built with a very shoddy Novi brand 2 coil stator. This stator has a major weakness in the construction and design of the ignition coil, which is poorly insulated and potted, leading to erratic performance and failure. As is common on many small power equipment engines, the high tension (secondary) stage of the coil is wound directly around the primary (lower voltage) winding all inside the flywheel. After a certain amount of figuring and experimenting, I have successfully re-wound the internal stator coil to be used in conjunction with an external high tension coil, this tutorial will explain how to do this.

The first step is to remove the flywheel. Its good to use a puller for these as they are made out of brass, and mar if you try the smack them with a hammer trick. Then remove the ignition coil itself, it will be the one on top with the light brown wrapping. Its held on with 2 7mm-head bolts.
From Blog


The coil is now hanging by two wires (plus the high tension spark plug wire), one wire is 'hot' wire going to the condenser, points, etc. The other wire is the 'ground' wire that ties into the black wire coming out the bottom of the stator plate. Both of these will need to be removed and reconnected or rewired so you can cut them off as close to the coil as possible. The high tension wire coming out of the coil can also be cut off. See where that HT wire ties into the wrapping? Yeah, moisture in there was probably part of the reason you've been having problems. On my bike, before this fix, you could see it sparking all around that shoddy joint.

You can take the removed spark plug wire and use it in your moped voodoo doll, or throw it away. You dont have a moped voodoo doll? Now is the time to make one, treat it kindly and massage in fine scented oils once a week to keep your bike running in tip-top shape.

Back to the coil. Now you are left with just the coil. At its heart this thing is just a hunk of steel with wires wrapped around it. Remember the electro-magnet from 2nd grade science class- it was probably a nail with wire wrapped around it. The coil is the same thing, only instead of using electricity to pick up paper clips, your moped is using a spinning wheel with magnets on it to create an electrical charge in the windings. Basically backwards of what you did in 2nd grade.

Basically, it works like this. The 'coil' has two parts to it, just like your electromagnet. The 'Core' which is the iron or steel chunk in the center (laminated out of sheets of steel to be more efficient) is like your nail. It is the part that becomes magnetized.

The 'windings' is/are the actual wire wrapped around the core. These conduct the electricity just like the wire wrapped around the nail in your magnet.

The four magnets in your flywheel are spinning around your coil. These magnets are oriented in the flywheel to alternate between positive and negative magnetic fields. Each time the flywheel rotates 90 degrees, the direction of the magnetic field in the core switches. When the magnetic field changes, we call that magnetic flux. For some reason the guys from ICP are still trying to figure out, magnetic flux causes an electrical current in the wire wrapped around the core. Electrons get spun around the magnetic field, and the wire develops a potential or voltage.

The amount of power in the wire has to do with several factors. First, the strength of the magnets and the strength of the field in the core. You cant usually make the magnets stronger, but you can make sure this is as strong as possible by getting the core snuggled up real close to the spinning flywheel. Second, the number of wraps of wire around the core. Each wrap contributes a tiny little bit of juice, so more wraps=more power. Finally the gauge of the wire serves as a limiting factor, you can only make as much power as the wire will allow before it melts.

So, back to our Peugeot. This guy is a little bit more complicated than your standard wire-on-a-nail coil as found in puch, minarelli, etc. The high tension coil is wound around the primary coil on the same core. We dont care about that for this article. Cut it all off.
From Puegeot


The coil is coated in some nasty epoxy-like crap, a few layers of cotton tape, two layers of wire some very thin and some thicker. There are two phenolic (a brown hard plastic-like material) retainers on the ends, be careful not to break them. I broke one and replaced it with a disc cut out of tupperware lid. I found the quickest way to get the wire off was by slicing it with a dremel, but you could unwind it or cut it with a sharp knife.

When you are done you should have something like this.
From Puegeot

If you took the inner layer of fabric tape off the core, thats ok, just wrap it with a layer of hockey tape or something similar. Fabric is preferred to plastic because it will absorb the epoxy when you go to re-pot the coil.

Now a word about magnet wire. Magnet wire is solid copper wire used for winding coils. RadioShack should have it, or better yet search out your local dungeon-esque electronics/radio/etc shop. Most areas have a place like this, forgotten by time somewhere in the Tube era, when people still fixed TV's. Build a relationship with the crumudgeonly old timer behind the counter (if you are lucky he will have thick glasses, suspenders, and a beard). When dealing with electronics like one finds on mopeds, you need someone who knows how things were done 'back in the day' to ask questions of.
If he looks like this - PAYDIRT!


Anyhow, back to the magnet wire. You're looking for 24 gauge, not because that was stock but because thats the fattest wire you can fit the necessary number of wraps on the core. The wire will come insulated with a clear-ish gold/brown or red 'varnish'. You dont want the windings to contact each other, in fact, thats probably why your old coil broke- all that hair thin wire rubbing with every engine vibration.

You will have to sand off a little on the end to solder to that tab on the core. This will be your ground. If you want to keep the stock electrical system with the brake light run from the coil, you could probably slip a little shrink wrap over this and solder it to the 'black' wire... but that system is prone to BS like having your bike not run when your bulb dies, so I prefer the hard ground.
From Puegeot


Now you will start winding the coil. This is where taking your time is worth it. Nice tight wrappings, evenly spaced, are the key.
From Puegeot


You may find it helpful to use a soft tool (something that wont scratch the insulation) to keep the windings tight.
From Puegeot


When you get to the end, make a nice sharp turn around and come right back. Its important to keep the ends square and even, because they set up the whole next layer and its easy to keep straight once it is on straight, and impossible once it gits wonky.

From Puegeot


Finally you should have something looking like this.

From Puegeot


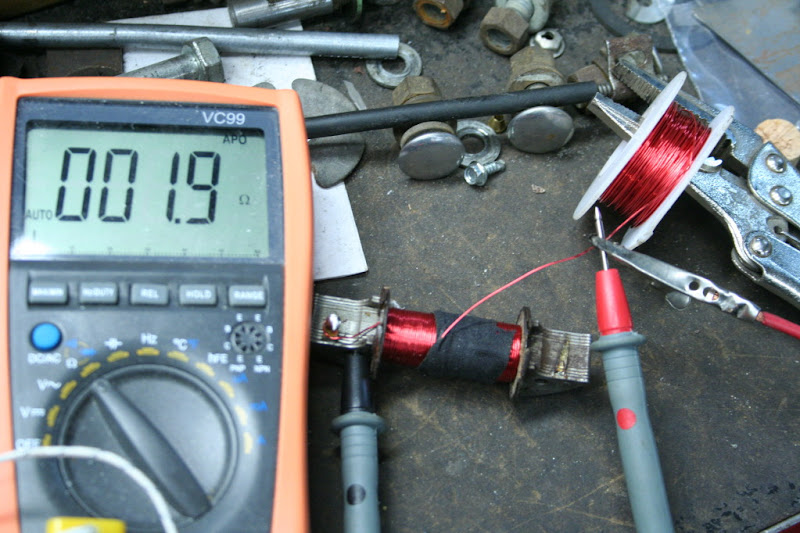
You will want to put on about 60 feet of wire, which works out to about 5 layers. This can be a little bit more, but it doesn't need to be, probably shouldn't go much less. What you are really looking for is the resistance of the coil. This will tell you the length of the wire.

Use some tape to hold down the loose end of wire and measure from that end to the ground wire.
From Puegeot


You are shooting for 2 ohms. More is OK because it means more wraps, but too much could fry your points or HT coil. Try for 1.8-2.4 ohms.

Finally after winding the coil, wrap some fabric tape around the whole coil. Fabric is the best because it will absorb any potting compound and turn into a fiber-glass like hard shell to protect your electrics.
From Puegeot

Now that your coil is all wound nice and tight, you'll have to get the power out of it to the rest of your electricals. You'll be sanding off the insulation again and soldering a lead on to the loose end of the cable. You can also solder it to the stock tab if that is still in place lodged between the layers of phenolic on one of the ends... thats probably the best actually.
From Puegeot

The next step will be re-installing the coil. This will be done by running a 'hot' wire out from the soldered tab and cleaning up the stock wiring. You will also have to install the high tension coil. Since the internal coil is designed for a Bosch (puch) system, you can use the bosch coil, or you can use the generic one, or do what i did and get a minarelli/CEV/Ducati coil and the bolt holes line up with the mystery bracket on the swingarm! The new wiring diagram will look something like this:
From Blog

Now, thats a super simplified diagram. I'm going to run a 12v rectifier/regulator on mine for brake, tail and headlights, but you might want to do something different. If you saved a ground lead as seperate you can probably hook that right up to the stock black wire that is there, and get a working tail light or brake light or something.. i dunno. Try it out.

Once everything is together and working, now would be the time to go ahead and pull that coil out enough to pot it. Potting is just applying some sort of glue/varnish/etc to the wires so they dont rub on each other with engine vibration and wear the insulation off. Crazy wayne suggested fingernail polish (you could also add a nice touch of color to your stator this way- use matching shrink wrap tube!) or varnish, polyurethane, epoxy, fiberglass resin, etc. Probably anything that is heat and water impervious.

When you are all said and done, your bike should look something like this... with a nice fat ignition wire that wont get cranky in the rain:
From Puegeot coil re-wrap

Pro tip: use a little di-electric grease on the spark plug wire when you install it, and finish it with either heat-shrink tube or use the stock rubbers with a tab of silicone gasket seal inside them.

Dont forget to set your timing when you replace the flywheel!

Good luck and happy blastin'

Special thanks to Mark Hand for the excellent photographs and Michael 'mike' Naz advising/answering stupid questions.

for more discussion on coil winding:
Re-wrapping the HPI light coil
Peugeot coil winding success!

Monday, January 24, 2011

Snowpedding, subarus, etc

This blog is serving as a reminder of how out of mopeds I've been lately. Well, I dunno about that out of mopeds, i mean i'm still riding, just not getting as much wrench time in as I would like.

I am still riding, which is more than most of you northerners can say...


Its not very interesting, my batteries were dying but it was a somewhat sketchy ride home. The first few big snowfalls of the year always seem to be the worst, this year the snow coming very late probably made it even worse. The drivers are all going super slow, you forget not to use your front brake... etc.

Anyhow that was a week or two ago, now snow, slush and salt are de rigeur (i think thats the term i'm looking for) for this part of the country. I'm really liking the Peugeot in the crap, variation has its advantages, keeping me from sliding around as much, but i really hate the dry clutch and the bike still needs some tuning, the low end grunt that i'm used to from my maxi ZA just isn't there for plowing through snowy drifts, and the clutch wants to drag and push when you try to slow down. Plus the belt gets wet and slips a lot also... ok so i guess this really isn't a great snowped.

I was hoping to have my other ZA built and ready for the snow so i didn't have to abuse this poor pug to the salty badness, but oh well.

School has been busy. I should be doing homework now but i need a break.

In more good news (also somewhat related to moving around milwaukee in the snow) I got Caitlin a new car... We're now a TWO subaru family! how great is that!
From Blog

I picked up this slightly beat 1993 legacy sedan last weekend. Well not the one in the picture, but almost the exact same. This has a little rust in the corners, but all around not bad. The Peugeot 505 SW8 was just not cutting it for her. The rear-wheel drive isn't bad for slipping around (it has a LSD in the rearend) but getting it stuck between berms when parellel parking was a nightmare, plus little things like the heater blower motor going out at the beginning of December and having to drive around the state for Xmas with no heater, were starting to add up to me being annoyed.

Plus i got a pretty smokin' deal on this car for $300. The pre-1994 (post '89) subaru legacies have the best powertrain subaru ever put in anything... as far as reliability goes. Subaru, doing everything different, decided to come out of the hole building the best motor they could, then progressively making it worse with head gasket problems, a crappy auto trans behind it, etc. This car is basically the sedan (boy i'd rather have a wagon, but oh well) high water mark of 1990's Subaru.

It needs a new exhaust, and it made it home with a leaking tire and 3.5 quarts of oil less than it should have had, but like i say about 5000 times a day lately, "I'm working on it, I'm working on it..."

Wednesday, January 12, 2011

Get ready to waste a few hours here


I try not to re-post much from the internet, but in the absence of any fun pictures in the last post (for some reason my computer stopped recognizing my SD card) I figured I'd send some folks over to this site for some moto-porn.

http://elsberg-tuning.dk/

Big block chevy's, sick 50cc's of all breeds, and a ton of photos I've never seen anywhere else. This stuff is really amazing, probably spent a few hours already looking at all the cool stuff this guy has posted.

Really amazing to me to see all the different ways people have tried to get more power out of 50cc engines. I think the challenge of working within a very limited format forces some of the most innovative ideas and gives creative engineering types a chance to test ideas.

I've recently become infatuated with a technology known as 'Fuel-Air stratified turbulent' injection... stupid acronym that really doesn't explain what is going on, but I'm going to try to convince someone here to let me implement it on a 4-stroke engine for the high mileage vehicle. It was designed for 2-stroke scooters by piaggio... long story short it is a mechanical direct-injection system that requires no electricity and can run up to 10k rpm... unreal. Not much for performance gains, but the fuel economy is through the roof.

more on that later...

Sunday, January 2, 2011

Holiday 'vacation' recap.

Wrote this a week ago, was waiting on some pics to post, guess i'll add them later...

Having the last two weeks off school has been nice, not quite as productive as it could have been, but thats the holidays for ya. I guess its supposed to be a vacation, but I've been working harder than usual to get some long-awaited projects finished up by the end of the year. Starting out with a very ambitious list in my little notebook, I'm happy to be able to say I checked off most of the boxes.

The Cranks hosted the third annual 'Fond-of-dudes' party with record attendance. Cool to see folks from Chicago, Madison, and Minneapolis join the merry-making this year. Good party with lots of food, but next year we'll do a better job of coordinating fondue pots.

I finally got around to machining the final few bits for the long-running stock Vespa project. I had to re-located the ring land pin, so i figured while i had the piston in the horizontal-axis rotary-index table-chuck-thingy in the mill, I'd use a 1/16" end mill to add some ring-land gas porting, or "BigBlockFiero Tech" as it is often called on the MA forums.

This is an idea seen on all sorts of pistons, mostly in 4 stroke applications, where the biggest advantage is better ring sealing. On a two stroke, the theory goes, that putting 'ports' into the upper face of the ring groove allows for gasses to escape around behind the ring on the down-stroke and deposit more oil on the piston and cylinder walls, cooling the piston. I've spent a lot of time mulling this over in my mind. Its a tricky thing, interpreting the theory and actual results, because tighter ring sealing is very important in piston cooling. You see, in a running engine you dont want any gasses between the piston and cylinder wall. The piston cools, primarily, through the cylinder wall, and oil conducts heat better than air. If you get any blow by you will run a lot hotter. In fact, i've seen a lot of piston seizures that show bad break-in or bad ring sealing and a lot of blow by, leading to carbon which further insulates the piston and cylinder wall, and gas insulating the piston and cylinder wall.

So for my money, I'd bet what we are really seeing with ring-land gas porting is a better piston ring seal. The down side to this is the greater pressure supposedly wears out the piston ring faster, although if done correctly I find it hard to believe it will make much difference. I've run the same rings for 10's of 1000's of miles with no problem on bikes before, so its a compromise i can live with if i burn out one ring at 2000 miles or so.

Anyhow, to make this all work you need to only run one ring. I was planning on doing that in the vespa anyhow because both the ring gaps landed right in the 3rd and 4th transfers I cut in. To replace the ring locating pin, i machined one out of brass. 2mm diameter, and pressed it into a 5/64" hole- which works out to 1.98mm and change. The pin went in with a little pounding so hopefully it will hold... it would be pretty depressing to shred another piston and cylinder after having put over 10 hrs of time into this setup. Especially considering that the last piston and cylinder lasted all of one trip around the block before I broke them trying to fix them. It would be pretty sad if i was also destroying $130 kits each time rather than free doorstops.

Everything finally got re-assembled on Friday. The vespa kicked right over and ran good once warmed up. I think i drilled out the atomizer tube too big on this one, because the low end has never been good, but now that i'm running 20 deg of blowdown and 158 deg of exhaust timing, its not expected to idle very well at low end. The clutch still grabs too early in my opinion, but hopefully once i get some more low-end back from tuning carb and ignition, it will have power to slip the clutch at lower speeds. The last time i had it together it was smoking the belt instead of slipping the clutch... stupid dry clutches. Once i get things dialed in i'll probably go to a larger diameter belt. I'm also looking at modifying the stock clutch by lightening it and adding some cooling fins, also machining out the belt groove so the wider belt will sit deeper and keep the dimensions the same, or even lower the gearing.

Also had some time to work on the Sachs, mechanically it is pretty much buttoned up. I had to add a small jumper chain for some reason... not sure why the chain got 6 links shorter from the 505/1C to the /2BX but thats how it goes sometimes. Got the chain on and squared away. Also finished up all the cable routing and such. The clutch and shifting is very smooth and accurate, but i can tell already that first gear is going to get annoying as it seems to require more articulation of the shift grip than neutral and 2nd. I wish the 1st/2nd positions were reversed. It was obviously designed with 2 as the 'main' gear, and 1 as a 'granny' gear for getting up hills and the like. 2 is the default position if the cable breaks or what not.

The way i have the gearing set up with a tomos 28 tooth in the rear and the standard 11 tooth up front gives it a standard-ish 1st gear, feels like maybe 16/40 puch gears. A big jump from the stock 11/43! This engine has so much butt-wrenching torque, i'm hoping to set this up with city/highway gears so i can shift comfortably at about 45 mph and pull up into the high 50's, low 60's without winding the piss out of the motor. Gonna be hard on the clutch, but being a manual I think smooth gentle shifting will prolong the life. When it does fry, i have a few tricks up my sleeve i'd like to try. The last straw being to completely drill out the output shaft on the crank and press in a splined 4130 shaft to adapt to a totally different(reinforced) clutch hub.

Since I'm building this to be a 'touring' bike- for long distance adventures and camping trips- i'm working on a slew of attachments starting with a large and very sturdy seat. To keep weight low I fabricated it from 3/16" sheet aluminum. Starting with a posterboard pattern, tracing and cutting from sheet metal, finally bending it up and welding the seams.

I'm getting much better at TIG on aluminum, but still not super happy with my results. Aluminum is a tricky son of a gun and demands perfect cleanliness and good fitment. Getting better with TIG I'm able to fill gaps better, but its hard to fill gaps and make it look good. Oh yeah, and make it strong, that is important too. Anyhow, the seat turned out pretty good. The bike is designed to have the weight on the seat post so I had to make a steel rib to transfer the weight onto the tube frame, and it should be strong enough to let me use the seat (probably tying in where the seat attaches to the luggage rack) to build a racking system. I would really like a retractable rack for carrying cases of PBR, and rails making it easy to attach and detach side bags.

I've also been thinking a lot lately of some sort of trailer hitch. Possibly using a piece of very stiff hydraulic hose to act like a ball hitch, but with a bit more control. Ideally I'd like to be able to tow a trailer that would be able to carry another moped like a 'tow dolly' so i can pick up broken down mopeds or transport them around without a car. Anyhow, maybe by next summer. Either way being able to fabricate aluminum will be a big help as it would be way too heavy to make any of this junk with steel, and aluminum doesn't rust. It is expensive if you buy it from the metal rack at home depot, but if you go to a good scrap yard, especially one that deals with industrial scrap, there is tons of it laying around they will sell you for the same scrap price they paid for it. I've found lots of good useful metal this way. Even built a copper still once from a scrap bin.

For Moped Factory work, I finished up a huge order over break and started work on some of my next round of projects. Another level of sophistication with some real top-notch performance parts. I'm trying to make headway on the moped factory blog as well, to try to get as much product information out there as possible.