My storage situation has become dire. I'm up to 15 or 16 motos and peds that are complete, probably 5 or 6 more in pieces, and everything is jammed into a small one car garage. Don't get me wrong, i'm pretty happy with my current shop situation, best shop setup I've had in years, but the excess inventory has been getting in my way and the 5 or 6 bikes out back in 'cold storage' under a tarp have been getting surface rust and bugs and crap all up in them, which sucks. Every time i want to work on something i have to push 2-3 bikes out and on Saturday it was raining and i couldn't move around the shop... I finally got pissed enough to do something about it.
So i've been planning out this little 'shed' for awhile. It took me about 4 or 5 hours to build and cost exactly $0. Even if you went out and paid real money for all the hardware store type parts, you could still get it done for $20 or so.
Ever since i was in high school and got my first truck i've been building stuff out of pallets. They are sturdy and work great for all sorts of structures. Shelves, buildings, decks, tree forts, Best part they are free.
The first step in building anything out of pallets is to find a good source of pallets. I've been lucky to always have an ample supply anywhere i've worked. The best places to find pallets are people who regularly take large shipments of things and break them up into small shipments. Construction or home improvement stores are great, but sometimes they are sneaky and hide their pallets or return them to the manufacturer. A wholesale building supply place is likely to have the extra long pallets, because they ship things like roofing panels and siding on them. The long pallets are the best kind.
What you want to find are pallets that are all the same size. You might find one beauty that is huge, but ultimately its easier to work with a bunch of same-sized pallets, or say, all your 'wall' pallets are one size and your 'roof' pallets are another size.
It is ALWAYS easier and cheaper to find the right size pallets than it is to modify them or buy extra wood to make odd-sized pallets work. Thats the first rule of pallet construction...pallets are free so if you can save time/money by wasting pallets, always sacrifice the pallets.
The pallet shed that i'll show you how to build here is by all means not the best, cheapest, or most awesome thing you could build. It is however super easy to build and it fit my needs. You could spend twice as much time on it and make it really awesome, walls and doors, etc. For someone who needs to store 4-5 mopeds or motos along side an apartment building or rental house, its a pretty simple basic structure you can build in a couple hours with minimal tools and no skills at all.
Here are the tools I used. The screws are 2" and 3" and despite the 'store bought' boxes they are actually re-used screws i salvaged from a pallet shelf i built in my old shop. You could use nails, or a nail gun if you're REALLY fancy, but for a rental house the screws are nice so you can take it apart when you move. You can use a bowsaw, chainsaw, or sawzall if you want, but you should only have to make a few cuts so the hand saw in my case took less time than getting out an extension cord.
The level is kinda fancy, but i like my roofs to drain water in a predictable fashion, and you want to make sure the legs are up and down straight so it doesn't tip over.

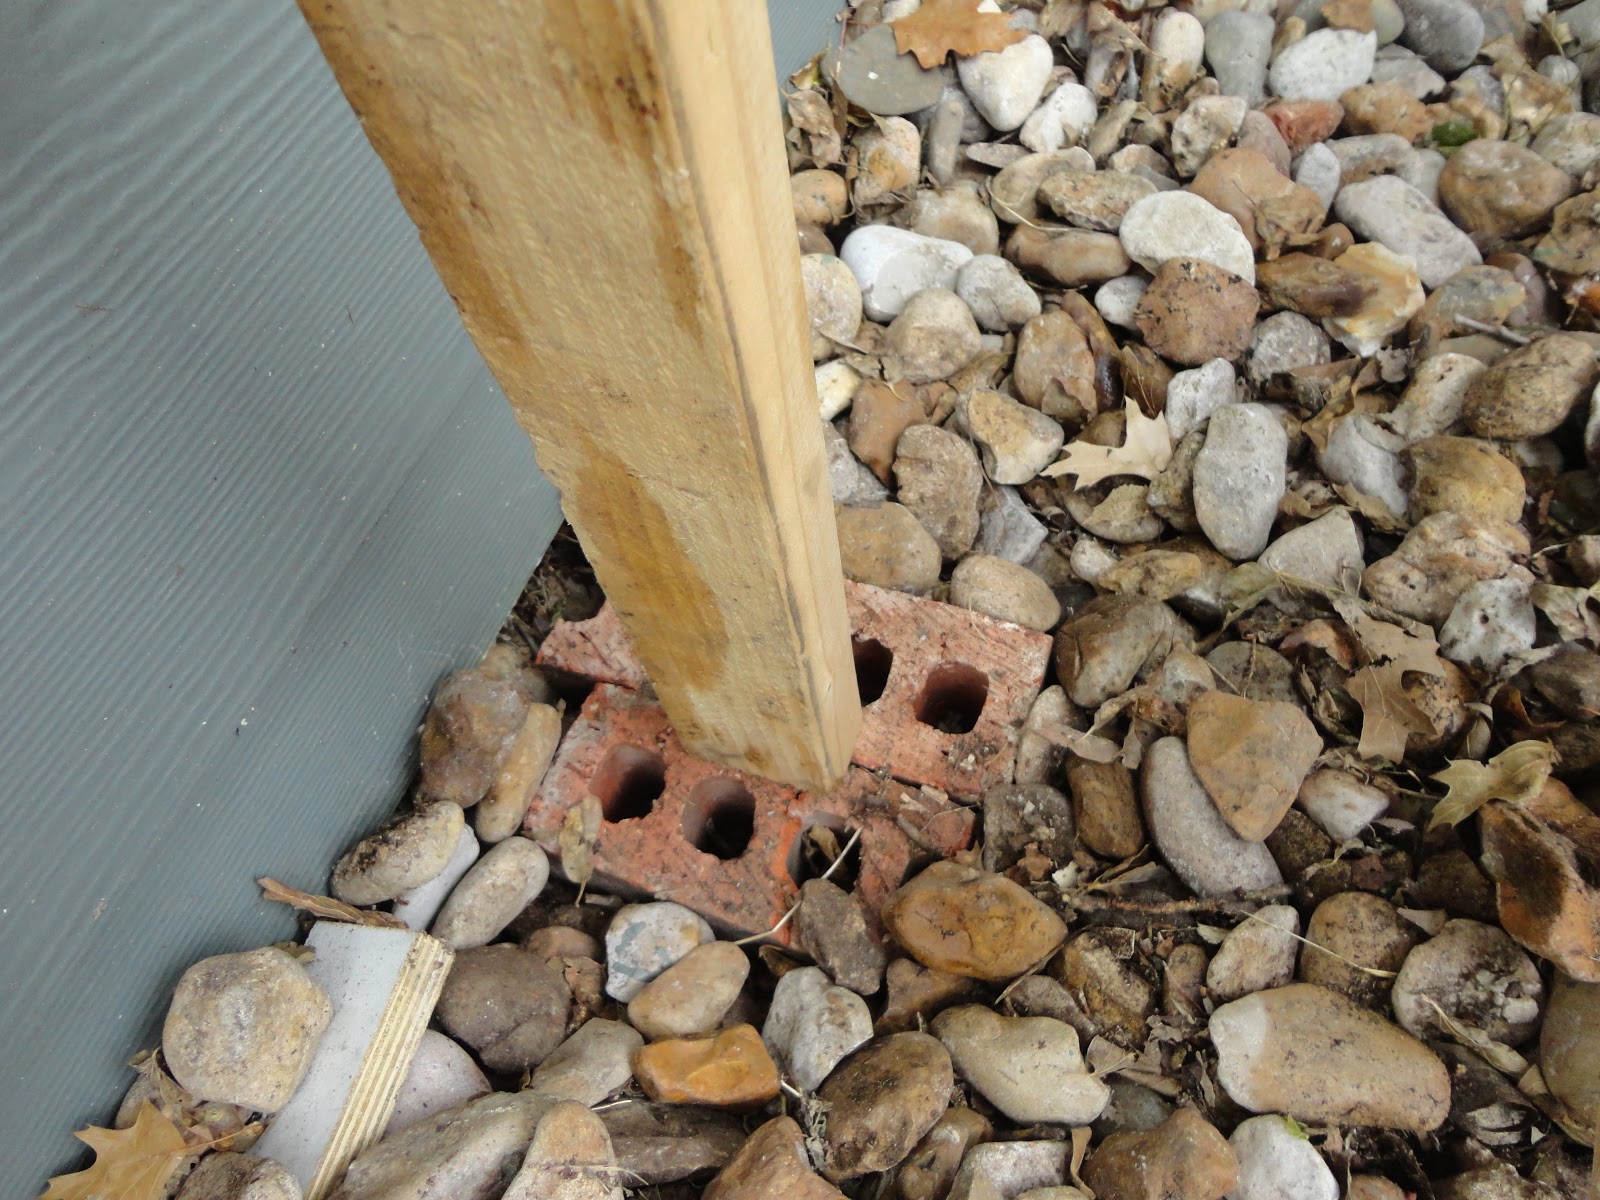
The first thing i did was measure the pallets and figure out where my legs would land. I dug down to hard dirt and laid out these bricks to provide A) a good footing and B) keep the wood legs out of the mud. If water gets into this soft junky pine wood, it will rot within a couple weeks. If you want to get all pro about this, you can use some 1-gallon ice cream buckets and redi-mix concrete to actually pour little footings. Scrap pieces of broken up concrete are really good for this too!
I used the big hammer up there and a 2x4 scrap to pound the footings down so they settle flat.
I broke my cardinal rule. I had 3 pallets that were similar but one was slightly longer than the others. No big deal. I lined them all up on a couple long 2x4's and screwed them together with the un-cut edge all lined up. I screwed the adjacent runners of the pallets into each other. This is where the c-clamp comes in handy, the pallets are all warped to hell, so I had to pull them into alignment.
This is nice because it straightens everything out and if you have pallets with cracks or knots in them it strengthens them by doubling up on the runners.

I screwed down a long 2x4 stringer to the ends of all the pallets. The 2x4's that I used for this were all collected from the dumpster at work over the last couple months. Worst case scenario, you go out buy yourself some 2x4's, they are cheap. You could probably disassemble enough pallets to get the wood but that is a lot of screwing around. Lots of construction sites throw out 2x4's you can salvage.

Now that the stringer is tieing all the clean ends together you can cut off the uneven ends and attach the stringer to the other side.


This picture doesn't show it well, but i had to do some creative tweaking to get the ends to all line up perfecto, and pull the warpy 2x4 into alignment.


And then you trim the excess off the stringers, and your 'roof' is finished.
The next part was really tough to do by myself, now I know why the amish get together 20 of their strongest buddies to 'raise' a barn. I had to get the roof up on top of the legs somehow without killing myself. It took a couple minutes of puzzling, but what i finally came up with was lifting up the roof and propping it at a 45 degree angle, then i screwed on the legs at a 80 degree angle, roughly, to give the roof some pitch. I used some scrap wood from the pallets to attach diagonal braces to the legs.
The next part was tricky. Holding a support in one hand, i picked up the whole roof and hinged it upwards on the legs. It weighed 150-200 lbs so this was no small feat lifting it over my head, then balancing it precariously on the scrap 2x4. It took me a couple tries to get it right, but when it was finally perched on the stilts, i drank a beer and took a picture.

The next part was pretty easy, I had grabbed a pallet with really long 4x4 stringers just to get those big 'legs. I figured the outer legs would be most important as the whole structure would be kinda tipped into them so they bear the most weight. I disassembled that pallet, and slipped those legs through the slats on the inside of the runners.
Then i adjusted my stilts so the roof would be at the right angle, and screwed in the big legs.
I attached 2 more 2x4's to hold the legs together, then i removed the hokey angle braces.
It was time for the Packer game, so I threw a tarp over the roof and threw my bikes underneath.

So as it sits, it is pretty sturdy. There are a lot of big screws keeping it from going parallelogram on me and collapsing, but its not strong enough for my tastes.
Later this week, i'll add some diagonal bracing across the front and back, and maybe add a diagonal brace on each side.
I'm currently on the lookout for some metal or plastic roofing panels to finish the roof. I'll cut the 4x4 posts off even with the roof and lay that over them. Its important when you build something like this to keep all the support beams inside the edge of the roof. If you dont, and water drips off a corner and runs down onto some beams, it will rot them really quick and weaken the wood where your screws attach.
Anyhow, thats just a quick primer on building your very own moped lean-to out of pallets. If you have a buddy help you, you could probably get it done in less than 2 hours. I'll post back when i get some walls on the side of this thing, and when i find some nice roofing material to finish it off, but the tarp or poly film roof is plenty good and i've used that in the past.
The most important thing for storing mopeds is just making sure that water doesn't collect underneath them, and making sure that there is enough air flow to ventilate and dry them out when its not raining.
This pallet shed is quite creative. Normally, building a shed requires a lot of lumber, but this one seemed only to have the cost of brackets and screws to keep it together. The finished project looks very nice for being so inexpensive. Do you know where the best place would be to find free or cheap pallets? I would be interested in recreating this in my backyard. http://www.abccrates.com.au/services.shtml
ReplyDeleteThis comment has been removed by the author.
ReplyDeleteThank you because you have been willing to share information with us. we will always appreciate all you have done here because I know you are very concerned with our. cheap bike rentals
ReplyDeleteThis was an interesting read. I enjoyed learning about this topic and your perspective provides useful insights. Some parts could have been expanded on further but overall it was informative.
ReplyDeletetarpaulin sheet
I really impressed by your this blog and its really Amazing. Thank You So Much.
ReplyDeleteblack tarpaulin