Its been a long, busy winter and between moving out to the 'burbs, having the kid, working non-stop and not having much for running mopeds (especially a running 2-seater) my ability to get to Cranks' Wednesday night rides has been at an all time low.
That just makes it all the better when I can get out, and last night
was no exception. Between final-ing this week and running around like a
crazyman in general, it was a real treat to get out and ride with the
crew.
It was pretty sweet to have Caitlin along on her own bike as well, I've tried a few times to get her to ride on her own and experience that side of mopeds, but the last few experiments ended badly, most notably Just the Tip 1, where she crashed pretty bad, due to riding my maxi with lousy brakes.
Getting her the general was something that has taken me a lot of time, a little luck, and some good moped karma. It was her first night riding a moped on her own since the JTT crash and I'm glad she could be on something safe and sturdy.
Dez was back too, which always makes things more fun. He really lives the moped lifestyle and he's been an awesome addition to the Cranks since the first night he rolled up out of nowhere on his moby and agreed to go rally with us the following weekend.
Not having ridden with these guys for awhile I was pretty surprised how fast the pack is rolling these days. Caitlin and I were the only ones who didn't have KITS and everyone was blasting us pretty bad. Its time for some upgrayyds and the minarelli might even get one of those 43mm DR kits if Caite continues to feel more and more confident in her abilities.
In other news, the tecno circuit finally showed up yesterday too, and in the next week or two should be riding along happily underneath the peugeot, hopefully this bike will at long last reach blaster 50cc status. So far everyone I've told about the project is pretty excited and I'm really amped to bring a mild 50cc circuit pipe to the peugeot market. It seems like there is a huge black hole in that market just waiting to be filled by something that will give people a choice between stock/joke pipes and rediculous loose your pedals and deal with ball joint nonsense pipes.
Friday, May 25, 2012
Thursday, May 24, 2012
Generelli
The General is pretty close to being done. I gotta say, after spending time in and out of this bike its not too bad, for a top tank that is.
During:
I never knew these were Taiwaneese, and very late for mopeds, mine is 1985... pretty surprising that these aren't still being made, even with a crummy honda lifan clone this would be a pretty sweet small motorcycle. It really is a small motorcycle, big hydraulic forks, partial DC electrical system, even the fork lock doubles as a kill switch! The brakes are huge drums that stop you like woah, and the controls are all motorcycle. Personally, I kinda like it for a motorcycle but I dont like it for a moped. After putting some miles on it, It really resembles a very light vintage enduro/dirt bike. The soft suspension and light weight make it very skittish like an old enduro type bike, but it turns in sluggish and resists being thrown around
Its actually lighter than my Peugeot, I think, but feels top heavy and mushy. Personally I like the exposed, tossable moped feeling better, but Caitlin wants something substantial between her legs and will appreciate the hydraulic forks, good brakes, and comfy seat, so its probably going to stay in the family for awhile.
The previous owner, Brandon from Minneapolis, was a high school kid and apparently a pretty good mechanic. I gotta say, I didn't do nearly this nice of work when I was in high school, i was an idiot. He had a lot of the minor stuff done, the rims were cleaned up (pretty well considering the chrome is worse than a lot of spray paint i've seen) the chain was about the right length, the spark plug wire and boot was replaced, he had my favorite kind of 'Window air conditioner filter foam' air filter on the SHA which doesn't leak too bad.
The list goes on, brand new gazelles with the ticklers still on them, new petcock, etc etc. Pretty nice bike all around, for $400 it was an awesome smokin' deal (even though it is the most expensive moped i've bought since my first maxi which i overpaid for).
There were only a few issues, but since this is a bike for Caitlin and it has to be perfectly reliable and safe, I had to take care of those right away. The pipe was at one point an EV Racing, it was all messed up. The header was cut and spliced... cant imagine why.. maybe it had been hack and welded then got hack and welded back? There was even a small bolt welded through the header for some completely inconceivable reason.
I could tell right away that this pipe had some design flaws from the factory. The header was way too small for the chamber, and it had a big ugly shim and over lap where the header goes into the divergent cone. I have developed a theory about this, because it is the same thing you see in the Proma GP, and to a lesser extent with the Boss. Aside from the obvious that it is much easier to weld a lap weld than a butt weld, there is something going on with these pipes that gives them better bottom end than pipes that dont have the step. I think when the header is kept small the exhaust pulse signal from a 50cc cylinder is much stronger... well any cylinder that is, but a small header is more critical on a small cylinder. So with limited porting and a short blow-down you maintain the strength of that exhaust pulse. The big step going into the chamber creates a pipe-within-a-pipe where that pulse hitting the end of that header tube creates its own return pulse before the return pulse from the chamber itself... I'm not sure if there is any validity to that theory but it would explain why pipes with that step in them work well on 50cc cylinders and why they seem to have a mystery power band way up high that you can hit with a high revving small displacement setup.
Either way, the header was too gnarled up to re-use and maybe my theory is just some crazy stuff i came up with in a dream and not real and its always good to go with tried and true stuff when you have 5000 variables and need something that will work without a lot of screwing around. With a long header this should keep plenty of grunt, and opening up like that, hopefully it will be able to stretch its legs on top.
To fix it I used my favorite trick of splicing in a piece of large diameter tube to give the header a slight overall taper. I bent up some 1" EMT conduit and combined it with the stock header to get the compound bend needed to clear everything. This is great for the top end of a pipe and doesn't really hurt the lows or mids. A lot of smart pipe makers use this trick to make a cheap tapered header without having to roll long tight cones, which are a pain in the butt and almost impossible with the tools i have access to. Plus it gives you a joint that you can put a little misalignment in to make things line up better.
The silencer was also a major problem. I rode the bike once and was amazed how quiet it was, i could tell the silencer was pretty badly plugged or something, and I was right. The perf tube was capped off inside, causing the gasses to go around the tube, through the glass, and out the back. It was homemade by the PO, who did a pretty good job of creatively making it re-packable and laid down some decent welds on it, but the design was flawed. Greasy fuzz was all jammed up at the back where exhaust should come out. The exhaust was all leaking out around the edges of the silencer and completely plugged off from coming out the back. Thats not good. Its really not much of a loss because the stock EV silencer is a completely worthless hunk of crap which usually breaks instantly anyhow, and even when it is intact, doesn't decrease noise much if any.
I set to work on version 2 of my Lymo silencer and came up with a nifty new way of packaging it that will give me some additional tuneability while only moderately restricting flow. There will be more details to come soon regarding this new silencer technology, but i'm pretty excited for the possibility of ninja-quiet mopeds. Even the higher performance version 1 that i built is quieter than a glass pack and has no flow restriction whatsoever. The new one is more restricted but easily as quiet as a stock pipe. The new packaging technique also allows the possibility for a relief valve to be incorporated that could open when you are WOT blasting and let more air out. It could actually lower the power band of your pipe so as you reach the top of the pipe's power band a valve opens and you get your power band back... awesome huh? Maybe? Who knows! The possibilities are endless! :Like a million people have experimented with this kinda stuff and made it work but until now nobody has really made the push to make it something everyone can have on their bike, so it hasn't reached that critical mass of a lot of people having them and developing a community of tuning knowledge. I'm going to get to a good jumping off point where everyone can have one of these and then start tweaking them and figure out what works for each pipe, engine, kit etc setup.
Its all under wraps for now until I get a production prototype fabricated, and there is still a lot of design engineering and testing to be done to get the design perfecto and quiet as possible, but for now i'm really happy at how well this is going to work on this bike. The older I get the more I like stock-ish bikes that do what a moped is supposed to do, get you where you are going as fun as possible. For Caitlin, riding a moped that isn't deafening and obnoxious is more fun than one that is, so for now Lymo2 is a success.
Any Minarelli fans should be excited reading this because the addition to a Minarelli to my fleet will be sure to precipitate the development of plenty of new goodies for the Minarelli crowd. I've already used my test buddies all over the country to help me design some great new Minarelli heads, but stuff like the engine stand holding this engine, didn't get designed and built until I had some personal motivation. I hate to plug my MF parts too much on my personal blog, but I gotta say these dumb little engine stands make working on engines on the bench so much easier. Its always a pain holding onto moped engines and with this little guy you have both hands free to wrench on stuff, plus it keeps everything tipped up vertical so working on the top end is a lot easier. Removing wrist pin circlips with the engine bolted down is night and day easier than trying to do it tipped on its side. Sorry for the plug but its true, i wouldn't make this stuff if I didn't need it myself, y'know.
Minarelli engine stands should be in stock at the major moped retaileirs in the next week or two. Dont worry tomos/sachs guys those will be out soon too. The rest of you guys will just have to wait, sorry. If you really want me to make some goofy engine stand for ya send me an email and i'll see what i can do.
Before going anywhere with the engine, I planned out some basic stock upgrades. Since I always buy basket cases, I always pull the cylinder off right away to make sure the engine is in good shape, no rusted out con rod bearings, that kinda thing, and this one was a beauty. The rings were perfect, no blow by whatsoever. These late model V1's are just really nice engines, the machining and casting on them is top notch, the roller bearing rod, etc. I haven't worked on many of these, but I believe people who do when they say they can take a ton of power and are rock solid reliable. If the 3500 miles on the odometer is to be believed, there is a lot of life left in this engine.
At first glance the porting is pretty aggressive for a stock engine. Should be in the 35mph + club no problem with the pipe. I left that alone for now. In the future it will get opened up a fair bit, but its always best to get a bike running 100% perfecto stock before screwing around with that sort of thing. (The 3rd rule of mopeds) The deck clearance was about 1.5 mm so I took the head down scosch and gave it a nice squish band for a bit more torque. As the engine gets tuned up, this head should maintain torque and keep things cool with bigger porting, for now it wont make much difference.
The intake on these is usually a huge restriction, coming from the factory at like 12 mm, there is a lot to be gained by port matching. Lucky for me the previous owner did a real nice job of this, opening up the whole intake manifold to 14mm... looks like i'll have to drill out the carb to match soon. Maybe i'll go to a much bigger and more tuneable Bing with a custom forward facing intake, to provide a nice smooth airflow into the engine. Ed says these like big carbs, and given the fact that it is a piston port i would agree, but for now that might be too much compromise of low end for a heavy bike that is supposed to be tame and predictable. I have a bad habit of over-tuning bikes that I want Caitlin to ride.. whoops. Maybe we'll end up with one of those 17mm bings on there or something wacky, for now the SHA should be good for her to get the hang of riding and feel more comfortable behind the handlebars.
Well that was about it, I bolted everything back up, tensioned the chain. The rear wheel is sitting a little screwy so the adjusters are at two different settings and the fender is much closer on one side than the other, but all in all its looking pretty good. I'm pretty sure the rear fender support (which is part of the tail light bracket) is misaligned or the tail light is a little tweaked. No big deal, but at full compression the tire will rub.
I rode it in to work yesterday and it was cruising along nicely at 35. The speedo -in motorcycle fashion- seems to be somewhat accurate matching up to a mounted speed camera on my ride to work. I'm almost positive the timing is too far advanced based on my visual looking at the points and seeing them too far open, the sluggishness on the top end, a possible pinging rattle, and that crusty whiteness on the piston crown. Dialing that in should get me a better idea of the true top speed and from there what performance mods are needed to get it hanging out with the big dudes.
I better hurry up and get either my sachs or polini on the road quick so i'm not slower than my girl; that would be embarassing!
During:
I never knew these were Taiwaneese, and very late for mopeds, mine is 1985... pretty surprising that these aren't still being made, even with a crummy honda lifan clone this would be a pretty sweet small motorcycle. It really is a small motorcycle, big hydraulic forks, partial DC electrical system, even the fork lock doubles as a kill switch! The brakes are huge drums that stop you like woah, and the controls are all motorcycle. Personally, I kinda like it for a motorcycle but I dont like it for a moped. After putting some miles on it, It really resembles a very light vintage enduro/dirt bike. The soft suspension and light weight make it very skittish like an old enduro type bike, but it turns in sluggish and resists being thrown around
Its actually lighter than my Peugeot, I think, but feels top heavy and mushy. Personally I like the exposed, tossable moped feeling better, but Caitlin wants something substantial between her legs and will appreciate the hydraulic forks, good brakes, and comfy seat, so its probably going to stay in the family for awhile.
The previous owner, Brandon from Minneapolis, was a high school kid and apparently a pretty good mechanic. I gotta say, I didn't do nearly this nice of work when I was in high school, i was an idiot. He had a lot of the minor stuff done, the rims were cleaned up (pretty well considering the chrome is worse than a lot of spray paint i've seen) the chain was about the right length, the spark plug wire and boot was replaced, he had my favorite kind of 'Window air conditioner filter foam' air filter on the SHA which doesn't leak too bad.
The list goes on, brand new gazelles with the ticklers still on them, new petcock, etc etc. Pretty nice bike all around, for $400 it was an awesome smokin' deal (even though it is the most expensive moped i've bought since my first maxi which i overpaid for).
There were only a few issues, but since this is a bike for Caitlin and it has to be perfectly reliable and safe, I had to take care of those right away. The pipe was at one point an EV Racing, it was all messed up. The header was cut and spliced... cant imagine why.. maybe it had been hack and welded then got hack and welded back? There was even a small bolt welded through the header for some completely inconceivable reason.
I could tell right away that this pipe had some design flaws from the factory. The header was way too small for the chamber, and it had a big ugly shim and over lap where the header goes into the divergent cone. I have developed a theory about this, because it is the same thing you see in the Proma GP, and to a lesser extent with the Boss. Aside from the obvious that it is much easier to weld a lap weld than a butt weld, there is something going on with these pipes that gives them better bottom end than pipes that dont have the step. I think when the header is kept small the exhaust pulse signal from a 50cc cylinder is much stronger... well any cylinder that is, but a small header is more critical on a small cylinder. So with limited porting and a short blow-down you maintain the strength of that exhaust pulse. The big step going into the chamber creates a pipe-within-a-pipe where that pulse hitting the end of that header tube creates its own return pulse before the return pulse from the chamber itself... I'm not sure if there is any validity to that theory but it would explain why pipes with that step in them work well on 50cc cylinders and why they seem to have a mystery power band way up high that you can hit with a high revving small displacement setup.
Either way, the header was too gnarled up to re-use and maybe my theory is just some crazy stuff i came up with in a dream and not real and its always good to go with tried and true stuff when you have 5000 variables and need something that will work without a lot of screwing around. With a long header this should keep plenty of grunt, and opening up like that, hopefully it will be able to stretch its legs on top.
To fix it I used my favorite trick of splicing in a piece of large diameter tube to give the header a slight overall taper. I bent up some 1" EMT conduit and combined it with the stock header to get the compound bend needed to clear everything. This is great for the top end of a pipe and doesn't really hurt the lows or mids. A lot of smart pipe makers use this trick to make a cheap tapered header without having to roll long tight cones, which are a pain in the butt and almost impossible with the tools i have access to. Plus it gives you a joint that you can put a little misalignment in to make things line up better.
The silencer was also a major problem. I rode the bike once and was amazed how quiet it was, i could tell the silencer was pretty badly plugged or something, and I was right. The perf tube was capped off inside, causing the gasses to go around the tube, through the glass, and out the back. It was homemade by the PO, who did a pretty good job of creatively making it re-packable and laid down some decent welds on it, but the design was flawed. Greasy fuzz was all jammed up at the back where exhaust should come out. The exhaust was all leaking out around the edges of the silencer and completely plugged off from coming out the back. Thats not good. Its really not much of a loss because the stock EV silencer is a completely worthless hunk of crap which usually breaks instantly anyhow, and even when it is intact, doesn't decrease noise much if any.
I set to work on version 2 of my Lymo silencer and came up with a nifty new way of packaging it that will give me some additional tuneability while only moderately restricting flow. There will be more details to come soon regarding this new silencer technology, but i'm pretty excited for the possibility of ninja-quiet mopeds. Even the higher performance version 1 that i built is quieter than a glass pack and has no flow restriction whatsoever. The new one is more restricted but easily as quiet as a stock pipe. The new packaging technique also allows the possibility for a relief valve to be incorporated that could open when you are WOT blasting and let more air out. It could actually lower the power band of your pipe so as you reach the top of the pipe's power band a valve opens and you get your power band back... awesome huh? Maybe? Who knows! The possibilities are endless! :Like a million people have experimented with this kinda stuff and made it work but until now nobody has really made the push to make it something everyone can have on their bike, so it hasn't reached that critical mass of a lot of people having them and developing a community of tuning knowledge. I'm going to get to a good jumping off point where everyone can have one of these and then start tweaking them and figure out what works for each pipe, engine, kit etc setup.
Its all under wraps for now until I get a production prototype fabricated, and there is still a lot of design engineering and testing to be done to get the design perfecto and quiet as possible, but for now i'm really happy at how well this is going to work on this bike. The older I get the more I like stock-ish bikes that do what a moped is supposed to do, get you where you are going as fun as possible. For Caitlin, riding a moped that isn't deafening and obnoxious is more fun than one that is, so for now Lymo2 is a success.
Any Minarelli fans should be excited reading this because the addition to a Minarelli to my fleet will be sure to precipitate the development of plenty of new goodies for the Minarelli crowd. I've already used my test buddies all over the country to help me design some great new Minarelli heads, but stuff like the engine stand holding this engine, didn't get designed and built until I had some personal motivation. I hate to plug my MF parts too much on my personal blog, but I gotta say these dumb little engine stands make working on engines on the bench so much easier. Its always a pain holding onto moped engines and with this little guy you have both hands free to wrench on stuff, plus it keeps everything tipped up vertical so working on the top end is a lot easier. Removing wrist pin circlips with the engine bolted down is night and day easier than trying to do it tipped on its side. Sorry for the plug but its true, i wouldn't make this stuff if I didn't need it myself, y'know.
Minarelli engine stands should be in stock at the major moped retaileirs in the next week or two. Dont worry tomos/sachs guys those will be out soon too. The rest of you guys will just have to wait, sorry. If you really want me to make some goofy engine stand for ya send me an email and i'll see what i can do.
Before going anywhere with the engine, I planned out some basic stock upgrades. Since I always buy basket cases, I always pull the cylinder off right away to make sure the engine is in good shape, no rusted out con rod bearings, that kinda thing, and this one was a beauty. The rings were perfect, no blow by whatsoever. These late model V1's are just really nice engines, the machining and casting on them is top notch, the roller bearing rod, etc. I haven't worked on many of these, but I believe people who do when they say they can take a ton of power and are rock solid reliable. If the 3500 miles on the odometer is to be believed, there is a lot of life left in this engine.
At first glance the porting is pretty aggressive for a stock engine. Should be in the 35mph + club no problem with the pipe. I left that alone for now. In the future it will get opened up a fair bit, but its always best to get a bike running 100% perfecto stock before screwing around with that sort of thing. (The 3rd rule of mopeds) The deck clearance was about 1.5 mm so I took the head down scosch and gave it a nice squish band for a bit more torque. As the engine gets tuned up, this head should maintain torque and keep things cool with bigger porting, for now it wont make much difference.
The intake on these is usually a huge restriction, coming from the factory at like 12 mm, there is a lot to be gained by port matching. Lucky for me the previous owner did a real nice job of this, opening up the whole intake manifold to 14mm... looks like i'll have to drill out the carb to match soon. Maybe i'll go to a much bigger and more tuneable Bing with a custom forward facing intake, to provide a nice smooth airflow into the engine. Ed says these like big carbs, and given the fact that it is a piston port i would agree, but for now that might be too much compromise of low end for a heavy bike that is supposed to be tame and predictable. I have a bad habit of over-tuning bikes that I want Caitlin to ride.. whoops. Maybe we'll end up with one of those 17mm bings on there or something wacky, for now the SHA should be good for her to get the hang of riding and feel more comfortable behind the handlebars.
Well that was about it, I bolted everything back up, tensioned the chain. The rear wheel is sitting a little screwy so the adjusters are at two different settings and the fender is much closer on one side than the other, but all in all its looking pretty good. I'm pretty sure the rear fender support (which is part of the tail light bracket) is misaligned or the tail light is a little tweaked. No big deal, but at full compression the tire will rub.
I rode it in to work yesterday and it was cruising along nicely at 35. The speedo -in motorcycle fashion- seems to be somewhat accurate matching up to a mounted speed camera on my ride to work. I'm almost positive the timing is too far advanced based on my visual looking at the points and seeing them too far open, the sluggishness on the top end, a possible pinging rattle, and that crusty whiteness on the piston crown. Dialing that in should get me a better idea of the true top speed and from there what performance mods are needed to get it hanging out with the big dudes.
I better hurry up and get either my sachs or polini on the road quick so i'm not slower than my girl; that would be embarassing!
Thursday, May 3, 2012
Sachs is running again!
Replacing the totally gone crank seals and fixing a major air leak means i down-jetted from 160 to 90 and i'm still rich as heck in my VM18.
The most shocking thing is how long it took me to figure out something was wrong. Sometimes you get locked into thinking one thing is the problem (timing, points, condenser) and cant see the forest through the trees. You end up putting a 160 jet in your VM18 mikuni and not realizing that you're about 80 sizes too big.
Now i gotta order some smaller jets.
In other news, had a chance to put some more miles on my new chambered silencer and it is working awesome. That huge athena 80 has more intake noise than most kit's exhaust, so its kinda hard to tell exactly how well it is working, but i'm building another one this weekend for Caitlin's minarelli and i'm thinking its going to be quiet as heck.
Moped neighbors everywhere are about to be super happy. Proma owners will start getting cookies from that sweet old lady next door again. The moped community can advance beyond the caveman approach to drilling holes in things and stuffing in a bunch of fuzz.
bah. i have a video of it running but cant get it to embed. guess y'all just have to wait with anticipation.
The most shocking thing is how long it took me to figure out something was wrong. Sometimes you get locked into thinking one thing is the problem (timing, points, condenser) and cant see the forest through the trees. You end up putting a 160 jet in your VM18 mikuni and not realizing that you're about 80 sizes too big.
Now i gotta order some smaller jets.
In other news, had a chance to put some more miles on my new chambered silencer and it is working awesome. That huge athena 80 has more intake noise than most kit's exhaust, so its kinda hard to tell exactly how well it is working, but i'm building another one this weekend for Caitlin's minarelli and i'm thinking its going to be quiet as heck.
Moped neighbors everywhere are about to be super happy. Proma owners will start getting cookies from that sweet old lady next door again. The moped community can advance beyond the caveman approach to drilling holes in things and stuffing in a bunch of fuzz.
bah. i have a video of it running but cant get it to embed. guess y'all just have to wait with anticipation.
Tuesday, April 24, 2012
Headlight Bumpski
Just a little bump.
There's lots of good hacks out there for rigging up brighter lights on mopeds. I've seen everything from adapting halogen bulbs into replaceable bulb headlights, motorcycle lights, automotive fog lights, LED's... etc, but nothing so far that was convincing enough to make me convert from running 1156 12v filament bulbs.. which are robust, work well and can be purchased at any gas station.
I was aimlessly browsing the asiles at my local Advance auto parts yesterday, waiting for the guy behind the counter to get the code scanner and scan my car, and I saw this little tiny halogen bulb.
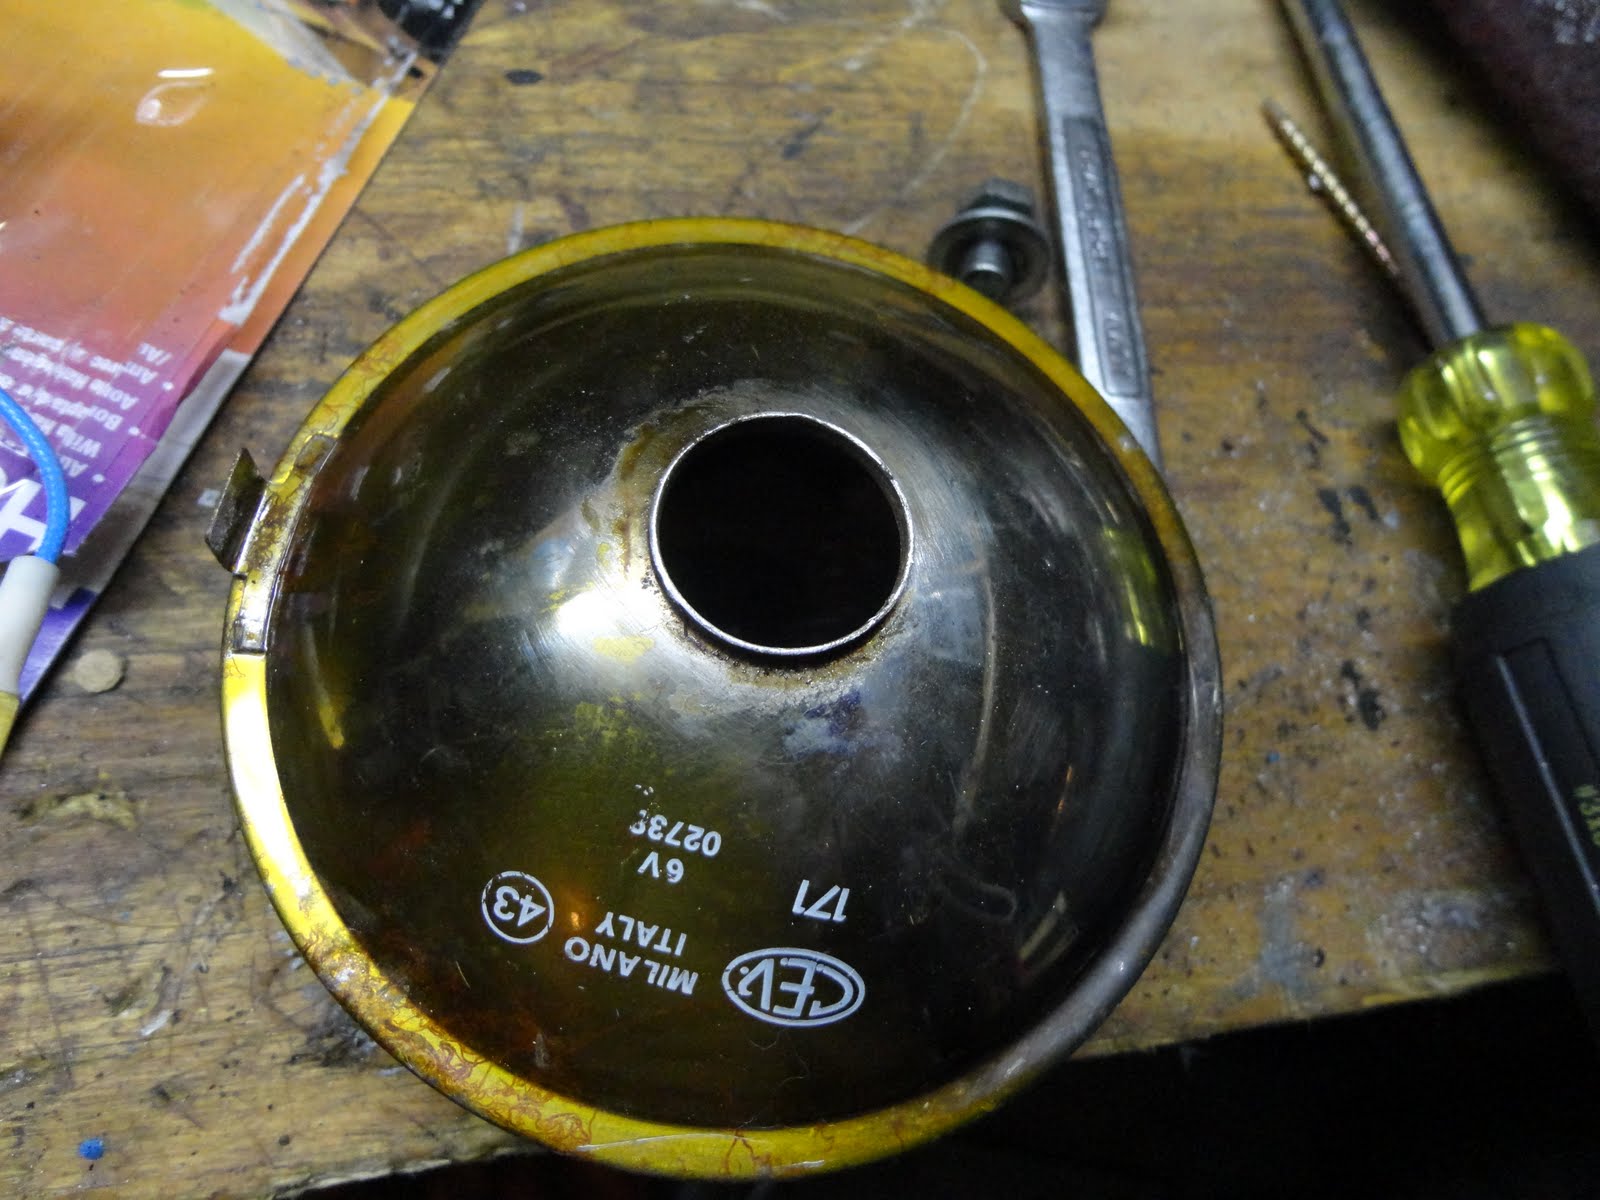
I test-fitted the H3 bulb to the hole that was left and it was perfecto. Even just enough interference that it took a careful tap from a hammer and punch to seat it in there perfectly. Its pressed-in so you can still get it out by prying at it with a screwdriver, so I soldered a little blob on there to hold it in, and stuck a spade terminal to act as a secure ground.
The whole thing took all of 15 minutes and cost 4.99. The H3 bulb works great, probably wont quite drive it with the stock 12v coil in my Sachs, but who knows. Probably brighter than the original.
The best part is, I'm reusing an otherwise thrown away sealed beam reflector and lens. The glass is way better than the modern stuff and the reflector is solid heavy metal with no corrosion (because it was sealed all these years!
Thats all for today, I'm working on tuning my Peugeot with the SHA so that article will be back up shortly with more details on how that is going. The Sachs is so close I can taste it. Just a few more things to wrap up and she'll be back on the road!
Plus there is a new ped in the stable for Caitlin. A general 5-star. Pretty sexy and much more stable. Its getting the treatment right away, so it will be rock-solid reliable for her and not break down all the time.
Spring is exciting!
There's lots of good hacks out there for rigging up brighter lights on mopeds. I've seen everything from adapting halogen bulbs into replaceable bulb headlights, motorcycle lights, automotive fog lights, LED's... etc, but nothing so far that was convincing enough to make me convert from running 1156 12v filament bulbs.. which are robust, work well and can be purchased at any gas station.
I was aimlessly browsing the asiles at my local Advance auto parts yesterday, waiting for the guy behind the counter to get the code scanner and scan my car, and I saw this little tiny halogen bulb.
I was looking at the base in the bottom and thinking of this sealed-beam headlight I drilled out the other day. I wanted to try to epoxy some kind of base into this light and adapt a halogen but the connector things for those are usually part of the headlight housing itself, meaning i was stuck waiting to find a broken headlight or something... rats.
Anyhow, getting to this part was pretty easy, i drilled a hole through the center of the inner bulb and smashed it out, then I heated up the metal reflector where it was soldered to the original bulb, and yanked the bulb 'base' part out of the reflector with carful application of pliers and torch to melt the solder.
I test-fitted the H3 bulb to the hole that was left and it was perfecto. Even just enough interference that it took a careful tap from a hammer and punch to seat it in there perfectly. Its pressed-in so you can still get it out by prying at it with a screwdriver, so I soldered a little blob on there to hold it in, and stuck a spade terminal to act as a secure ground.
The whole thing took all of 15 minutes and cost 4.99. The H3 bulb works great, probably wont quite drive it with the stock 12v coil in my Sachs, but who knows. Probably brighter than the original.
The best part is, I'm reusing an otherwise thrown away sealed beam reflector and lens. The glass is way better than the modern stuff and the reflector is solid heavy metal with no corrosion (because it was sealed all these years!
Thats all for today, I'm working on tuning my Peugeot with the SHA so that article will be back up shortly with more details on how that is going. The Sachs is so close I can taste it. Just a few more things to wrap up and she'll be back on the road!
Plus there is a new ped in the stable for Caitlin. A general 5-star. Pretty sexy and much more stable. Its getting the treatment right away, so it will be rock-solid reliable for her and not break down all the time.
| Just a lil' tease for now... ooh so nice working on engines with the MF engine stand! |
Spring is exciting!
Dellorto SHA boring
Introduction
Dellorto SHA carburetors are common, cheap, easy to tune, compact and complete junk. They are made about as cheaply as you can possibly make a operational carb, probably less than half as many parts as are in the carb in your leaf blower, but because of that, they are highly modifiable, robust and easy to work with if you know some of the tricks. Starting with a standard 12:12, you can create a very functional and precisely tuned carb that will easily perform as well, if not better than the stock 16:16 or equivalent, but dont expect to slap it on your kitted puch and have it run out of the gate.
SHA carbs come stock from a few different manufacturers. Mostly Italian brands, Minarelli, Garelli, Morini, Tomos A35 (very few A3) and some of the later model Motobecane and Peugeot. There are also Chinese clones that are out there, possibly Indian as well. By the time you finish tuning the carb, it doesn't matter if it is an old one or a new one, so I've found the clones to be totally functional. The clone used to be available for $20 so I bought them, but now they cost more. The nice thing is that all the seals and needle are good, most used SHA's will leak and need a new needle. The bad is sometimes they need the jet tapped to the correct dellorto jet size. Dellorto Jets are 5mm by .8, which is a commonly available size. If you can find a bottoming tap that will help, otherwise do the tapping with the emulsion tube removed.
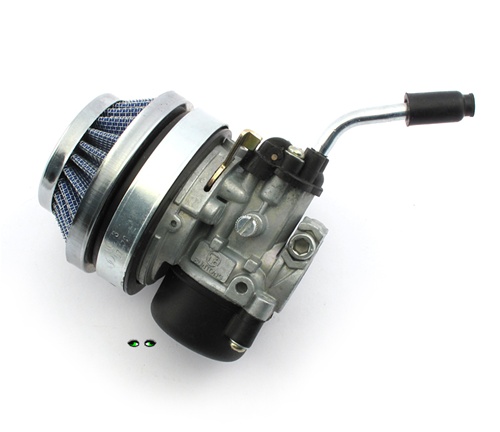
https://www.treatland.tv/SHA-15mm-clone-carburetor-p/sha-15mm-clone-lever-pack.htm
OK so, briefly, what we're going to do here is pretty simple, first dissassemble the carb completely, then we have to pull out the emulsion tube (brass tube thingy in the middle of the venturii), then bore out the inside of the carb. The emulsion tube goes back in, the carb gets reassembled, back on the bike. The carb is then tuned by modifying the holes in the emulsion tube and the slide cutaway. Fun!
Part 1: Boring
Dissassemble the carb completely. You can leave in the idle screw if you want to, maybe the choke if you're good. Clean up everything as well as you can, tooth brush and carb cleaner (and safety goggles).
The emulsion tube is pressed into the carb underneath the main jet. When you remove the mainjet you might be able to see the brass lurking down there. You have to slide it out the bottom through the main jet and its fit snug. The first few of these i did, I used needle nosed pliers on the inside grabbing the tube, then someone told me this trick and it blew my mind.
Find a very small screw, I believe the one I use would be considered a #4 wood screw. You need a #2 phillips head to drive it, so its pretty small.
Screw it into the hole in the bottom of the emulsion tube. You'll have to press down firmly to get the thread to catch, but it will. The smaller the screw the better the thread catches. Tighten the screw reasonably tight, I'm not sure how to describe it but you'll feel the threads grabbing in the brass and stop before it strips the threads.
Grab a blow torch, propane is fine. You could probably put the whole dinghus in the oven too, but it might smell like varnish gas or kill you or something. Here I am using team overkill to very lightly flick the bottom of the jet snorkel thing with some heat. The carb is some bogus zinc/aluminum/matchbox car crap metal so it will melt pretty easily.
Now you'll grab those diagonal pliers you see sitting there pinch up against the head of the screw. This is why we put it in the vise upside down, you can give the joint of those pliers a quick tap with your right hand while you hold the pliers with your left hand, and that screw will yank the tube right outta there.
BOOM! TUFF ACTIN' TINACTIN
Its ok if you're excited, this is mopeds after all.
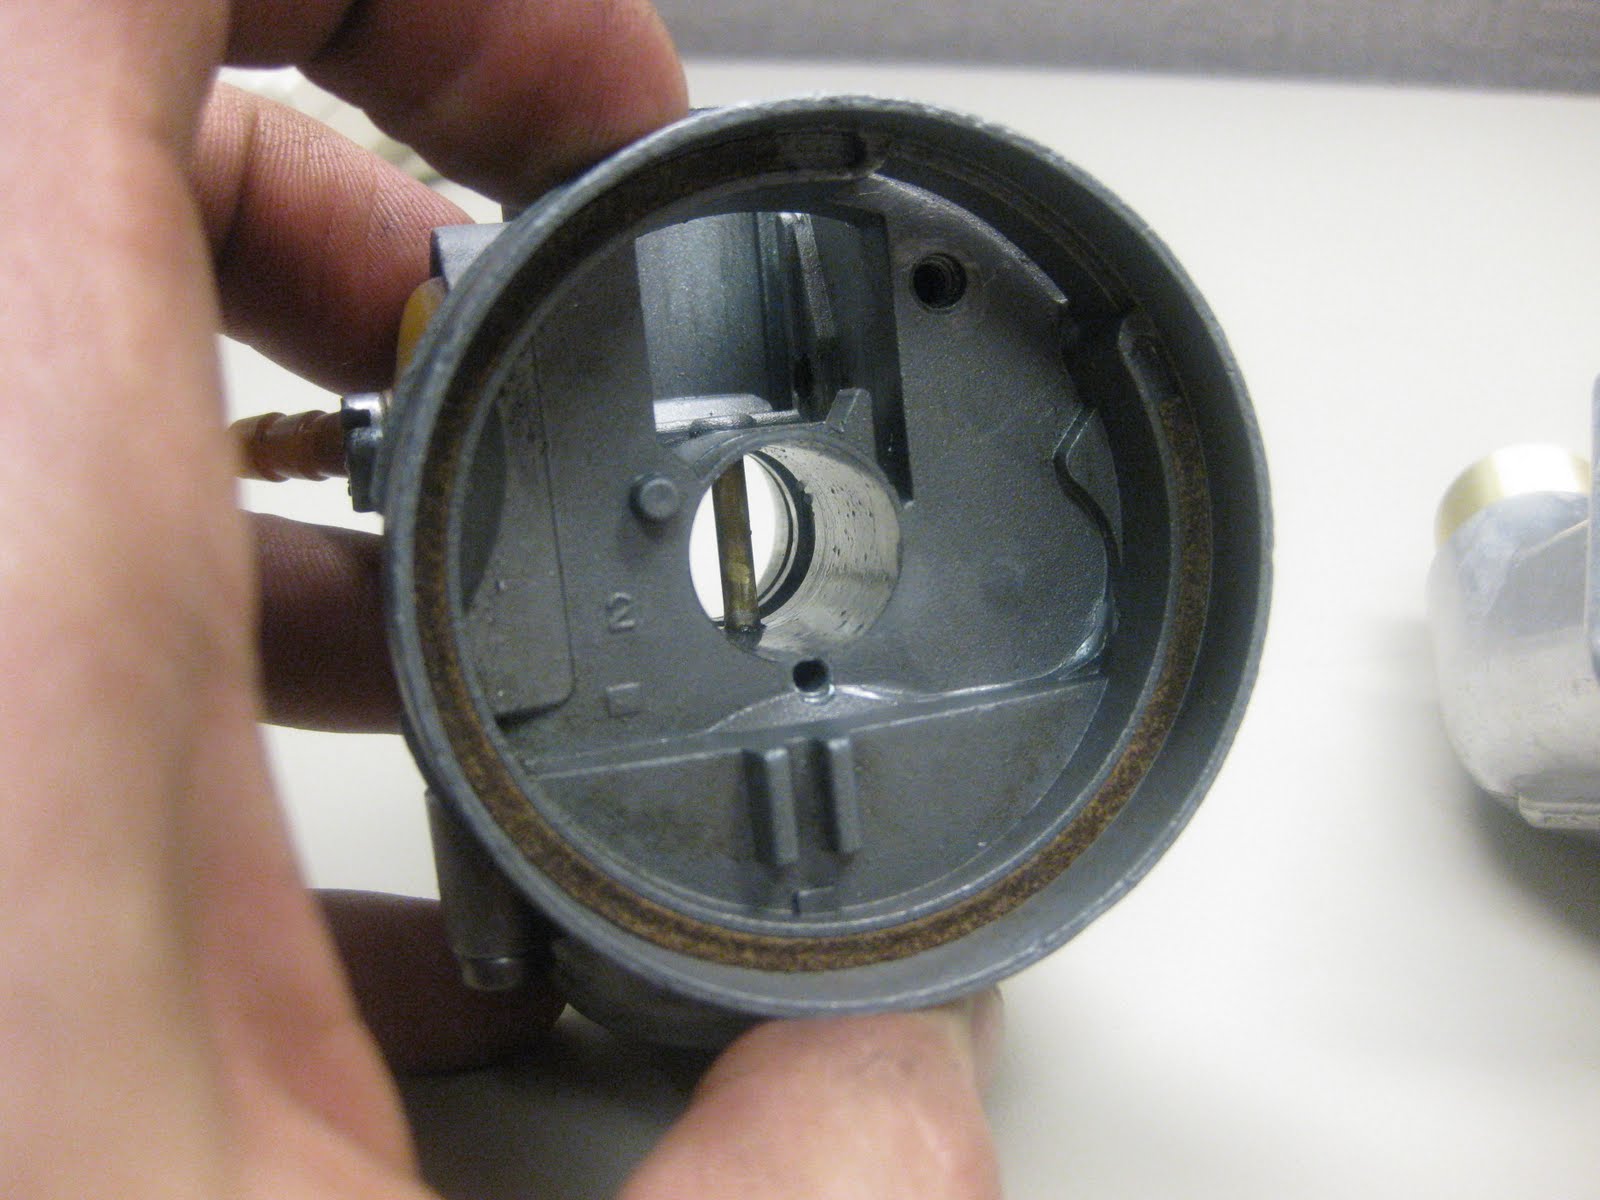
So now you're looking at this:
Now the carb is ready to be drilled out, see no tube in your way!
I didn't document the whole drilling out process, lots of other people have talked about it and discussed it on the forums, but its really up to you to figure out how you want to make that hole bigger. Personally I do it on a lathe with a drill bit and a few reamers, then I use a taper reamer to give it some venturii effect. You can just use a large drill bit and do a pretty good job if you go very slowly, I would definitely recommend a drill press at the very least.
This is a picture of one i did a few years ago, I'm pretty sure we're doing 5/8 here, just under 16mm. If you have a mill you can offset the reamer slightly so you dont break through that thin edge on top, but normally the biggest you can get these is somewhere around 15mm.
Some people with very steady hands even do this with a dremel and a sanding drum or stone or something. Crazy! If thats all you have, go for it, just be careful. I've never done that so i dont know how well it works.
Now that your carb is bored out, you'll have to clean up the burrs. The most important one is where the throttle slides in, if you dont file that off your throttle plate can jam and leave you stuck on full throttle. Not good. Also the emulsion tube hole in the bottom will have a burr which should just knock out with a small drill bit, and the inlet and outlet of the carb might have some junk. Small files work the best for this, if there is a lot of grungus you can get a dremel in some of those places.
Once everything is cleaned up, we'll have to re-insert the tube. First, it makes it a lot easier to sand down that press fit a little bit so you can get it in and out without having to heat it up. The shoulder at the bottom of the tube is what seats in the carb so get some emory paper or sand paper and chuck it in a drill. Be careful because it goes fast, you just want to take the tiniest hair off. Try it in the carb as you sand it down and see. You want it to go in about half way then get snug.
Dont install that tube just yet, there is another tricky part we have to check on. If you look closely at the bottom of the slide groove, from clamp side of the carb, you'll see a tiny hole. That has to line up with the tiny hole on the bottom of the emulsion tube, or the bike wont idle. This is probably the biggest reason people who drill dellortos cant get them to idle. In most cases the hole lines up with the other two holes in the carb, but sometimes that hole is slightly off. In this case it is way off. I'm pretty sure they drill these after the tube has been pressed in, so if Vinnie had a rough night last night, yours might look like this.
Here I've already marked with a black line the location of that hole, when you go to insert this thing you'll have to line up the black line with the hole you see sighting in from the clamp side of the carb.
Cool. The last step is to check that you lined the hole up right. You need a small strand of wire. I find that grabbing a strand from a wire brush and yanking it out works really well for this. Poke through that hole and make sure it went all the way, Not sure how to explain the feel of this, but you'll know it when its right. If the wire doesn't go in all the way, you have to play around with pulling the tube out and turning it slightly either way. Now that you loosened up that fit a little you should be able to do that just tapping it out with the pilers.
And now you have something like this, ready to be tuned.
Part 2: Setup/ Tuning
The SHA is tuned by adjusting 3 things: Main jet, emulsion tube holes, and slide cutaway. I could also include air filter in there because it makes a huge diifference on the operation of this simple carb, and you might want to think about changing it around if you aren't getting the performance you want.
Setting up the carb will require a shim. Most intakes are 18 or 19mm. The clamp size is 21mm (20.8-21mm) so a 1mm or 1.5 mm thick shim will be needed to fit your intake. Here i made one out of brass and pressed it onto this intake so i wouldn't have to worry about loosing it.
I also like to use an o-ring in the groove there to prevent air leaks.
Obviously match your intake and clean things up.
Oooh la la! That looks nice!
Install everything on the bike. As far as air filters go, its going to depend a lot on your mounting situation. If you can find a stock air filter that will fit that is probably the best. Because of the way the mid-range is set up on these things, they like to have a little resistance.
Ok so now we should probably discuss how this thing works a bit more. Fuel is flowing up through the main jet. When it is at idle and the throttle is closed, fuel is flowing out that tiny hole in the bottom of the slide slot. As you open the throttle you expose the other two holes and the fuel flows out of those holes. As air is passing the throttle slide it is going from high pressure low speed, to low pressure high speed, by Bernouli's principle. This is why the throttle cutaway matters, the cutaway will determine how much the air speeds up. When you put a slant on the bottom of the slide, known as 'cutaway' the air gets slowed down before it hits the emulsion tube. This has the effect of raising the pressure of the air at the tube, which reduces the amount of fuel that gets sucked up through the tube, in effect making you leaner.
This crappy drawing shows how the cutaway matters more at less than 1/2 throttle. You are in effect creating a nozzle, you go from a small opening to a bigger opening and as a result the air slows down. You can see above how when the throttle is mostly closed, the ratio between the front to the back is bigger than the ratio of front to back on the second drawing. This means that at low throttle, the air gets slowed down more, and the cutaway has more effect.
This is cool because 2 strokes tend to have a peaky power curve and therefore a peaky fuel delivery curve. When your pipe hits you are making more power and need more fuel (richer) than the linear curve that most stock-ish engines need.For most two strokes this means that the wide open throttle/ high rpm conditions require a dumping of fuel, but when the porting isn't flowing very well the mix should be leaner On more advanced carbs you can use smaller idle jets and an atomizer tube setup for progressive fuel delivery. On the SHA you are stuck with a relatively constant delivery of fuel.
Another interesting point about these is that reed valve engines (which as we know make more power in the low-midrange than piston port) will work better with the stock-ish flat fuel delivery curve. Thats why SHA's are popular among peugeot and av10 dudes, they run pretty good out of the box. For a piston port engine that has less midrange, especially if its a big kit or ported, you will need to modify the carb. This is also why, with PHBG or Mikuni carbs, reedvalve engines will work well with a 'four stroke' atomizer, which has a flatter fuel delivery curve, and piston port engines need the '2 stroke' atomizer.
So by mimicing that effect by changing the taper on the bottom of the slide, you can run a larger main jet so your top end is nice and fat, and your bottom end stays crispy. If you have ever ridden a puch piston ported 65 or 70 kit with a unmodified 16 SHA you will notice the rich bottom end, this wont hurt anything, but it makes your throttle response on the low end poor and when you mod a stock small carb, it is really bad. Porting a stock cylinder can make this really bad, and the stock cylinder doesn't make enough torque in the low end to make up for it.
The size and placement of the emulsion tube holes also plays into the fuel delivery curve. Unlike carbs with needles, air bleed, and different emulsion tubes, the SHA is very simple: want more high-end fuel delivery, drill out the top hole, want more low-end drill out the bottom hole. Usually when modifying a 12mm carb to 16 mm or so, you will need to enlarge both of them some If you have a set of jet drills, which you should, just reach them in the intake there and drill it out, if you dont, you can use the corner of a file to slit them out bigger.
If you combine the progressive effects of cutting the slide, and drilling out the holes, you can play around with things enough until the carb works very well across the entire powerband. If you use jet drills you can stick the emulsion tube in once and forget it, if you have to keep pulling it in and out you will want to chew it up with some pliers on the seating area when you put it in for good, so when you push it in, it jams in there. It would be really frustrating if that thing was loose.
Follow up: Added 4/24
This took me a while to get to, had a lot of projects get in the way, but very slowly over the last month or so I've been getting the Peugeot back together. The variator got modified to delay shifting and keep the engine in a higher rpm power band. The SHA got installed along with the intake manifold, and the engine got mounted back in the bike.
At first, the best i could do at tuning was to get it running ok-ish by drilling out jets and swapping around air filter pieces. The float needle was leaking like crazy, so fuel was pouring out and making the low end impossibly rich. It took a week for the needle to get to me, and with it some appropriately sized jets in the 60's and 70's.
This would be a good point to remind you, of course, that its absolutely necessary to have a properly functioning carburetor. All the parts have to work. This would seem obvious, but i've ridden bikes for people 'hey, can you ride this and see if i'm jetted right?' followed up by, 'oh yeah it leaks a little, you've got to rev it to keep it running.' Well, shoot, there's part of yer problem right there partner!
I've done dumb tricky stuff to try to save old crusty needles like filing a new point on them and shimming them up in the float with some beer can, but to be honest, its just not worth your time or mine. You will spend more than $5 on the gas you loose when you forget to turn your petcock off, and nothing gets you kicked out of shop spaces or gets people mad at you for parking your bike on the sidewalk, like a puddle of gasoline. Something about fire hazard, blah blah, yeah that too.
Dellorto SHA carburetors are common, cheap, easy to tune, compact and complete junk. They are made about as cheaply as you can possibly make a operational carb, probably less than half as many parts as are in the carb in your leaf blower, but because of that, they are highly modifiable, robust and easy to work with if you know some of the tricks. Starting with a standard 12:12, you can create a very functional and precisely tuned carb that will easily perform as well, if not better than the stock 16:16 or equivalent, but dont expect to slap it on your kitted puch and have it run out of the gate.
SHA carbs come stock from a few different manufacturers. Mostly Italian brands, Minarelli, Garelli, Morini, Tomos A35 (very few A3) and some of the later model Motobecane and Peugeot. There are also Chinese clones that are out there, possibly Indian as well. By the time you finish tuning the carb, it doesn't matter if it is an old one or a new one, so I've found the clones to be totally functional. The clone used to be available for $20 so I bought them, but now they cost more. The nice thing is that all the seals and needle are good, most used SHA's will leak and need a new needle. The bad is sometimes they need the jet tapped to the correct dellorto jet size. Dellorto Jets are 5mm by .8, which is a commonly available size. If you can find a bottoming tap that will help, otherwise do the tapping with the emulsion tube removed.
![]() |
| Lever Choke Carb w/ filter- $50 from treats (Jets do not fit) |
OK so, briefly, what we're going to do here is pretty simple, first dissassemble the carb completely, then we have to pull out the emulsion tube (brass tube thingy in the middle of the venturii), then bore out the inside of the carb. The emulsion tube goes back in, the carb gets reassembled, back on the bike. The carb is then tuned by modifying the holes in the emulsion tube and the slide cutaway. Fun!
Part 1: Boring
Dissassemble the carb completely. You can leave in the idle screw if you want to, maybe the choke if you're good. Clean up everything as well as you can, tooth brush and carb cleaner (and safety goggles).
The emulsion tube is pressed into the carb underneath the main jet. When you remove the mainjet you might be able to see the brass lurking down there. You have to slide it out the bottom through the main jet and its fit snug. The first few of these i did, I used needle nosed pliers on the inside grabbing the tube, then someone told me this trick and it blew my mind.
Find a very small screw, I believe the one I use would be considered a #4 wood screw. You need a #2 phillips head to drive it, so its pretty small.
Screw it into the hole in the bottom of the emulsion tube. You'll have to press down firmly to get the thread to catch, but it will. The smaller the screw the better the thread catches. Tighten the screw reasonably tight, I'm not sure how to describe it but you'll feel the threads grabbing in the brass and stop before it strips the threads.
Grab a blow torch, propane is fine. You could probably put the whole dinghus in the oven too, but it might smell like varnish gas or kill you or something. Here I am using team overkill to very lightly flick the bottom of the jet snorkel thing with some heat. The carb is some bogus zinc/aluminum/matchbox car crap metal so it will melt pretty easily.
Now you'll grab those diagonal pliers you see sitting there pinch up against the head of the screw. This is why we put it in the vise upside down, you can give the joint of those pliers a quick tap with your right hand while you hold the pliers with your left hand, and that screw will yank the tube right outta there.
BOOM! TUFF ACTIN' TINACTIN
Its ok if you're excited, this is mopeds after all.
So now you're looking at this:
Now the carb is ready to be drilled out, see no tube in your way!
I didn't document the whole drilling out process, lots of other people have talked about it and discussed it on the forums, but its really up to you to figure out how you want to make that hole bigger. Personally I do it on a lathe with a drill bit and a few reamers, then I use a taper reamer to give it some venturii effect. You can just use a large drill bit and do a pretty good job if you go very slowly, I would definitely recommend a drill press at the very least.
This is a picture of one i did a few years ago, I'm pretty sure we're doing 5/8 here, just under 16mm. If you have a mill you can offset the reamer slightly so you dont break through that thin edge on top, but normally the biggest you can get these is somewhere around 15mm.
Some people with very steady hands even do this with a dremel and a sanding drum or stone or something. Crazy! If thats all you have, go for it, just be careful. I've never done that so i dont know how well it works.
Now that your carb is bored out, you'll have to clean up the burrs. The most important one is where the throttle slides in, if you dont file that off your throttle plate can jam and leave you stuck on full throttle. Not good. Also the emulsion tube hole in the bottom will have a burr which should just knock out with a small drill bit, and the inlet and outlet of the carb might have some junk. Small files work the best for this, if there is a lot of grungus you can get a dremel in some of those places.
Once everything is cleaned up, we'll have to re-insert the tube. First, it makes it a lot easier to sand down that press fit a little bit so you can get it in and out without having to heat it up. The shoulder at the bottom of the tube is what seats in the carb so get some emory paper or sand paper and chuck it in a drill. Be careful because it goes fast, you just want to take the tiniest hair off. Try it in the carb as you sand it down and see. You want it to go in about half way then get snug.
Dont install that tube just yet, there is another tricky part we have to check on. If you look closely at the bottom of the slide groove, from clamp side of the carb, you'll see a tiny hole. That has to line up with the tiny hole on the bottom of the emulsion tube, or the bike wont idle. This is probably the biggest reason people who drill dellortos cant get them to idle. In most cases the hole lines up with the other two holes in the carb, but sometimes that hole is slightly off. In this case it is way off. I'm pretty sure they drill these after the tube has been pressed in, so if Vinnie had a rough night last night, yours might look like this.
Here I've already marked with a black line the location of that hole, when you go to insert this thing you'll have to line up the black line with the hole you see sighting in from the clamp side of the carb.
Cool. The last step is to check that you lined the hole up right. You need a small strand of wire. I find that grabbing a strand from a wire brush and yanking it out works really well for this. Poke through that hole and make sure it went all the way, Not sure how to explain the feel of this, but you'll know it when its right. If the wire doesn't go in all the way, you have to play around with pulling the tube out and turning it slightly either way. Now that you loosened up that fit a little you should be able to do that just tapping it out with the pilers.
And now you have something like this, ready to be tuned.
Part 2: Setup/ Tuning
The SHA is tuned by adjusting 3 things: Main jet, emulsion tube holes, and slide cutaway. I could also include air filter in there because it makes a huge diifference on the operation of this simple carb, and you might want to think about changing it around if you aren't getting the performance you want.
Setting up the carb will require a shim. Most intakes are 18 or 19mm. The clamp size is 21mm (20.8-21mm) so a 1mm or 1.5 mm thick shim will be needed to fit your intake. Here i made one out of brass and pressed it onto this intake so i wouldn't have to worry about loosing it.
I also like to use an o-ring in the groove there to prevent air leaks.
Obviously match your intake and clean things up.
Oooh la la! That looks nice!
Install everything on the bike. As far as air filters go, its going to depend a lot on your mounting situation. If you can find a stock air filter that will fit that is probably the best. Because of the way the mid-range is set up on these things, they like to have a little resistance.
Ok so now we should probably discuss how this thing works a bit more. Fuel is flowing up through the main jet. When it is at idle and the throttle is closed, fuel is flowing out that tiny hole in the bottom of the slide slot. As you open the throttle you expose the other two holes and the fuel flows out of those holes. As air is passing the throttle slide it is going from high pressure low speed, to low pressure high speed, by Bernouli's principle. This is why the throttle cutaway matters, the cutaway will determine how much the air speeds up. When you put a slant on the bottom of the slide, known as 'cutaway' the air gets slowed down before it hits the emulsion tube. This has the effect of raising the pressure of the air at the tube, which reduces the amount of fuel that gets sucked up through the tube, in effect making you leaner.
![]() |
| Note: This picture was wrong before, thanks to Todd Kingeshaft for fixing it! |
This crappy drawing shows how the cutaway matters more at less than 1/2 throttle. You are in effect creating a nozzle, you go from a small opening to a bigger opening and as a result the air slows down. You can see above how when the throttle is mostly closed, the ratio between the front to the back is bigger than the ratio of front to back on the second drawing. This means that at low throttle, the air gets slowed down more, and the cutaway has more effect.
This is cool because 2 strokes tend to have a peaky power curve and therefore a peaky fuel delivery curve. When your pipe hits you are making more power and need more fuel (richer) than the linear curve that most stock-ish engines need.For most two strokes this means that the wide open throttle/ high rpm conditions require a dumping of fuel, but when the porting isn't flowing very well the mix should be leaner On more advanced carbs you can use smaller idle jets and an atomizer tube setup for progressive fuel delivery. On the SHA you are stuck with a relatively constant delivery of fuel.
Another interesting point about these is that reed valve engines (which as we know make more power in the low-midrange than piston port) will work better with the stock-ish flat fuel delivery curve. Thats why SHA's are popular among peugeot and av10 dudes, they run pretty good out of the box. For a piston port engine that has less midrange, especially if its a big kit or ported, you will need to modify the carb. This is also why, with PHBG or Mikuni carbs, reedvalve engines will work well with a 'four stroke' atomizer, which has a flatter fuel delivery curve, and piston port engines need the '2 stroke' atomizer.
So by mimicing that effect by changing the taper on the bottom of the slide, you can run a larger main jet so your top end is nice and fat, and your bottom end stays crispy. If you have ever ridden a puch piston ported 65 or 70 kit with a unmodified 16 SHA you will notice the rich bottom end, this wont hurt anything, but it makes your throttle response on the low end poor and when you mod a stock small carb, it is really bad. Porting a stock cylinder can make this really bad, and the stock cylinder doesn't make enough torque in the low end to make up for it.
The size and placement of the emulsion tube holes also plays into the fuel delivery curve. Unlike carbs with needles, air bleed, and different emulsion tubes, the SHA is very simple: want more high-end fuel delivery, drill out the top hole, want more low-end drill out the bottom hole. Usually when modifying a 12mm carb to 16 mm or so, you will need to enlarge both of them some If you have a set of jet drills, which you should, just reach them in the intake there and drill it out, if you dont, you can use the corner of a file to slit them out bigger.
If you combine the progressive effects of cutting the slide, and drilling out the holes, you can play around with things enough until the carb works very well across the entire powerband. If you use jet drills you can stick the emulsion tube in once and forget it, if you have to keep pulling it in and out you will want to chew it up with some pliers on the seating area when you put it in for good, so when you push it in, it jams in there. It would be really frustrating if that thing was loose.
Follow up: Added 4/24
This took me a while to get to, had a lot of projects get in the way, but very slowly over the last month or so I've been getting the Peugeot back together. The variator got modified to delay shifting and keep the engine in a higher rpm power band. The SHA got installed along with the intake manifold, and the engine got mounted back in the bike.
At first, the best i could do at tuning was to get it running ok-ish by drilling out jets and swapping around air filter pieces. The float needle was leaking like crazy, so fuel was pouring out and making the low end impossibly rich. It took a week for the needle to get to me, and with it some appropriately sized jets in the 60's and 70's.
This would be a good point to remind you, of course, that its absolutely necessary to have a properly functioning carburetor. All the parts have to work. This would seem obvious, but i've ridden bikes for people 'hey, can you ride this and see if i'm jetted right?' followed up by, 'oh yeah it leaks a little, you've got to rev it to keep it running.' Well, shoot, there's part of yer problem right there partner!
I've done dumb tricky stuff to try to save old crusty needles like filing a new point on them and shimming them up in the float with some beer can, but to be honest, its just not worth your time or mine. You will spend more than $5 on the gas you loose when you forget to turn your petcock off, and nothing gets you kicked out of shop spaces or gets people mad at you for parking your bike on the sidewalk, like a puddle of gasoline. Something about fire hazard, blah blah, yeah that too.
Saturday, April 14, 2012
Place holder, for now
I wanted to get a post up here just to remind myself what I've been doing the last couple weeks. Maybe kind-of a teaser for now because I promise to fill in all the details, pics, and everything else once i have more time to write.
Sachs:
Been working slow but sure on the sachs, the engine has been together for a couple weeks now but i wanted to powdercoat the intake manifold, previously painted crappily with primer, and sand the clutch discs to see how they would hold up. I've got the whole new clutch drawn up on napkins, and once i find some time i'll be re-designing the pack in solid works. Hoping to be able to put together an 'uberclutch' that outperforms the german one for about $100 us.
Is this why you had an air leak?
Engine re-fitted temporarily, nice and shiny p-coat intake manifold! Damn that sexy. Now its just hooking all the cables back up, tuning it, fitting the seat cover, adding buddy pegs, finishing the airbox/airfilter... i guess there is quite a lot to be done yet.
Peugeot:
Finally got the new intake manifold attached. Also modded (lightened) the variator and pulled 3 balls out of the clutch. Woah, what a difference! Unfortunately I cant compare what the carb change did and what the variator change did independantly because i did them at the same time. Due to the peugeot having the 'old style' mounting bracket where the spring rod thingy doesnt come out, installing the engine is a godawful pain in the ass, so i elected to do them both at the same time. The reconditioned SHA is leaking like it has a hole in it, so I ordered some new jets and a new needle and i'll be installing those and finishing the tuning this week. Low end tuning is rich as hell because the air filter has gas dripping out of it... darn.
Bridgestone:
Got the rear hub rebuilt, still have to bend the bent swingarm back into place, and re-fix the clutch, but we are making slow progress.
Mopedfactory:
Working on a few new parts, hobbit subframe braces for racers and heavy dudes, and the sachs clutches mentioned.
yikes! Maybe i'll have time this week to fill in the rest of that, maybe not. whew, sobusynow. Leaving you with a little view of the shop. AMERICA!!!!!!!!
Sachs:
Been working slow but sure on the sachs, the engine has been together for a couple weeks now but i wanted to powdercoat the intake manifold, previously painted crappily with primer, and sand the clutch discs to see how they would hold up. I've got the whole new clutch drawn up on napkins, and once i find some time i'll be re-designing the pack in solid works. Hoping to be able to put together an 'uberclutch' that outperforms the german one for about $100 us.
Is this why you had an air leak?
Engine re-fitted temporarily, nice and shiny p-coat intake manifold! Damn that sexy. Now its just hooking all the cables back up, tuning it, fitting the seat cover, adding buddy pegs, finishing the airbox/airfilter... i guess there is quite a lot to be done yet.
Peugeot:
Finally got the new intake manifold attached. Also modded (lightened) the variator and pulled 3 balls out of the clutch. Woah, what a difference! Unfortunately I cant compare what the carb change did and what the variator change did independantly because i did them at the same time. Due to the peugeot having the 'old style' mounting bracket where the spring rod thingy doesnt come out, installing the engine is a godawful pain in the ass, so i elected to do them both at the same time. The reconditioned SHA is leaking like it has a hole in it, so I ordered some new jets and a new needle and i'll be installing those and finishing the tuning this week. Low end tuning is rich as hell because the air filter has gas dripping out of it... darn.
Bridgestone:
Got the rear hub rebuilt, still have to bend the bent swingarm back into place, and re-fix the clutch, but we are making slow progress.
Mopedfactory:
Working on a few new parts, hobbit subframe braces for racers and heavy dudes, and the sachs clutches mentioned.
yikes! Maybe i'll have time this week to fill in the rest of that, maybe not. whew, sobusynow. Leaving you with a little view of the shop. AMERICA!!!!!!!!
Monday, March 26, 2012
Fixin' yer Subaru exhaust
This is just a quick one but I wanted to write it up somewhere before I forgot.
If you own a Subaru and know the undeserved feeling of superiority that comes with driving around a monster truck that looks like a dumb station wagon, you probably have had or will have your blissful driving experience ruined by a noisy exhaust. Most old cars in general are riddled with exhaust problems (it takes a beating down there piping out highly corrosive mixtures of acidic vapors).
It seems like every Subaru I've owned (3 now) has suffered from the same problem, the whole exhaust holds up pretty well but for some reason these stupid flanges rot out. It probably has something to do with how they are welded or the material of the flange or something like that but you go over a bump and your car gets louder, you smell exhaust and go underneath to find something like this:
So the other day I cut out a handful of flanges and made a couple of these:
Quick, easy, permanent. You cut off the tail pipe with a hack saw, angle grinder, sawzall, sharpened toothbrush whatever. This little guy bolts onto the other flange and clamps on around the tail pipe with a regular exhaust u-clamp thingy. Since every Subaru from the '86 brat i have up to the 2001 outback uses the same flange and same 2" exhaust plumbing, this little dingus is pretty universal.
If you want one send me an email. $35 shipped, cheap! I even shot some paint on the weld and unprotected flange so it wont rust so fast.
I put one on the 2001 outback and it worked great. Still a pain in the ass having to jack the muffler out of the rubber hangars, cut the pipe off, somehow everything moved.... 15 minute repair turns into 3 hours.. but its a hell of a lot easier than the alternative which involves going into the parts store, sifting through a catalog to get the right flange (ordering it and waiting 3 days while your car is up on jacks with no exhaust system), removing the whole exhaust, trying to weld the new flange to the rusty old pipe... blah! And the flanges aren't welded on exactly straight!
The slight bit of slop in the slip-fit coupler takes up enough of the wierdness to get it all together, and it makes a tight seal without needing a welder or having to weld an airtight seam on rusty pipe... tough.
If you own a Subaru and know the undeserved feeling of superiority that comes with driving around a monster truck that looks like a dumb station wagon, you probably have had or will have your blissful driving experience ruined by a noisy exhaust. Most old cars in general are riddled with exhaust problems (it takes a beating down there piping out highly corrosive mixtures of acidic vapors).
It seems like every Subaru I've owned (3 now) has suffered from the same problem, the whole exhaust holds up pretty well but for some reason these stupid flanges rot out. It probably has something to do with how they are welded or the material of the flange or something like that but you go over a bump and your car gets louder, you smell exhaust and go underneath to find something like this:
So the other day I cut out a handful of flanges and made a couple of these:
Quick, easy, permanent. You cut off the tail pipe with a hack saw, angle grinder, sawzall, sharpened toothbrush whatever. This little guy bolts onto the other flange and clamps on around the tail pipe with a regular exhaust u-clamp thingy. Since every Subaru from the '86 brat i have up to the 2001 outback uses the same flange and same 2" exhaust plumbing, this little dingus is pretty universal.
If you want one send me an email. $35 shipped, cheap! I even shot some paint on the weld and unprotected flange so it wont rust so fast.
I put one on the 2001 outback and it worked great. Still a pain in the ass having to jack the muffler out of the rubber hangars, cut the pipe off, somehow everything moved.... 15 minute repair turns into 3 hours.. but its a hell of a lot easier than the alternative which involves going into the parts store, sifting through a catalog to get the right flange (ordering it and waiting 3 days while your car is up on jacks with no exhaust system), removing the whole exhaust, trying to weld the new flange to the rusty old pipe... blah! And the flanges aren't welded on exactly straight!
The slight bit of slop in the slip-fit coupler takes up enough of the wierdness to get it all together, and it makes a tight seal without needing a welder or having to weld an airtight seam on rusty pipe... tough.
Subscribe to:
Posts (Atom)